シェアする
シェアする
Move Tool and Bounding Box - Japanese Only
みなさまどうも。
続きまして『移動ツール』と『バウンディングボックス』を使用してみましょう。
まずツールパネルの左上あたりに注目です。その中に以下の矢印マークが確認できますでしょうか。

これが『移動ツール』です。こちらは主に画像などを移動させたいときに使うツールとなります。まずはこちらをクリックして『移動ツール』を選択してみてください。そうするとマウスのカーソルが『移動ツール』と同じ形になっているのが確認できたと思います。
さて、この移動ツールは慣れないと操作が少々ややこしいです。
画像(レイヤー)を移動させたいといった場合に画像の上でドラッグすれば動きそうなもんですがPhotoshopでは動きません。移動ツールを選択した状態で、対象となる画像(レイヤー)をさらに選択状態にしたうえでドラッグをする必要があったりします。
画像(レイヤー)を選択状態にしないで移動ツールを使おうとすると「選択しているレイヤーがないため移動ツールが使えません!」とPhotoshopさんに怒られてしまいます。試してみるとすぐに確認できるかと思います。
画像(レイヤー)を選択状態にするには『Ctrl』(command)キーを押しながらその画像をクリックすればOKです。
画像が選択されているかどうかは右下にある『レイヤーパネル』というところで確認ができます。以下が未選択の状態で、
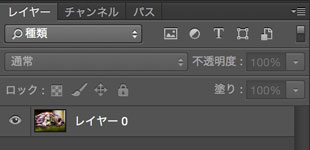
以下が選択されている状態です。選択状態の画像(レイヤー)は反転表示されているのが確認できるかと思います。
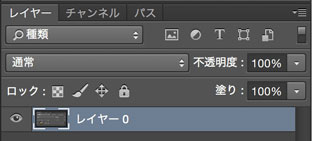
尚、『レイヤーパネル』の中の各レイヤーの項目をクリックしても画像(レイヤー)を選択状態にすることができます。以下の画像の赤枠あたりですね。
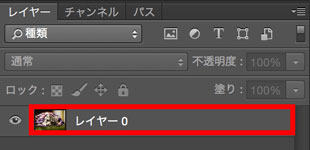
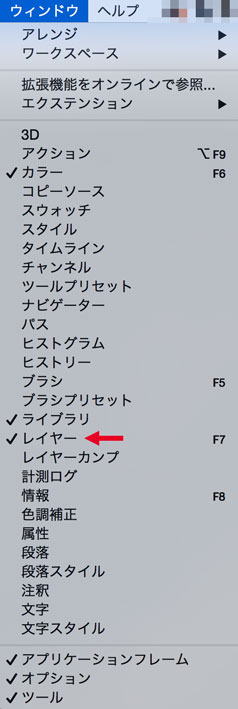
『レイヤーパネル』が表示されていなかった場合はメニューバーの『ウィンドウ』の中の『レイヤー』という項目にチェックをいれれば出てきます。
さて、選択状態にできたら作業領域の中でドラッグをしてみましょう。画像が動けばOKです。
ドラッグする領域は作業領域の中ならどこでもOKです。画像(レイヤー)の上をドラッグしなくてはいけないというルールはありません。
もし画像(レイヤー)を選択状態にしているにもかかわらず全く動かなかった場合は選択している画像(レイヤー)が『背景』になっていないか確認してみてください。
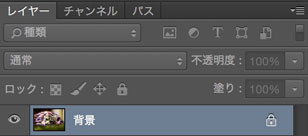
Photoshopでは背景となっているレイヤーは動かせません。最新のPhotoshopCCでは「レイヤーがロックされてるので動かせません!」と教えてくれるのですぐ気づくかと思います。
背景となっているレイヤーを通常のレイヤーに変更するには『レイヤーパネル』の中にある鍵のマークをクリックしてください。そうすると普通のレイヤーへ変更することができます。以下の赤矢印のところですね。
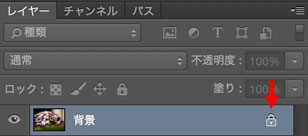
こんな感じで移動ツールはあまり直感的とは言えない操作感になっちゃってますので慣れないと少々ややこしいです。移動ツールが思った通り動いてくれないといった場合には以下の項目を確認してください。
- 移動ツールがちゃんと選択されているか
- 画像(レイヤー)が選択状態になっているか
- 画像(レイヤー)が背景となっていないか
この辺を確認すれば多分解決できるかと思います。
先程からちょいちょい出ている『レイヤー』については次の記事で解説していきますね。
移動ツールを選択している状態でキーボードの矢印キーを使用すると画像(レイヤー)を1pxずつ動かすことができます。細かな位置を調節したい場合は非常に便利ですので覚えておきましょう。
というわけで続きまして『バウンディングボックス』というのを使ってみましょう。ちょっと前の記事で画像の大きさを変更する方法を紹介しましたが、この『バウンディングボックス』でも画像を拡大縮小したりすることができます。さらに回転させたり歪ませたりすることができますので中々便利です。
移動ツールを選択した状態で上のほうにある以下の画像の部分を確認してみてください。その中に『バウンディングボックスを表示』という項目があるかと思います。これにチェックを入れてみてください。

すると以下のようになるかと思います。
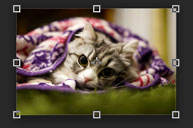
表示している画像に枠がつきましたね。これが『バウンディングボックス』となります。試しに枠の角にマウスのカーソルをあててドラッグしてみてください。すると画像の大きさが変更できたと思います。
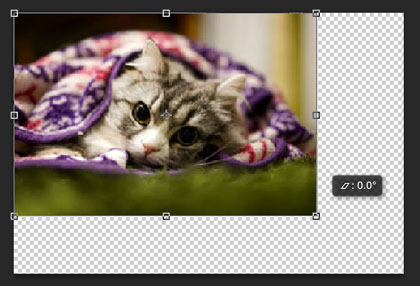
画像がはみ出して確認できなくなってしまったら『カンバスサイズ』を大きめにしてみてください。そうすると確認できるかと思います。
※『カンバスサイズ』についてはこちらへ。
Photoshop上の上部にある各ツールの設定を変更できる部分は『ツールオプションバー』、もしくは『オプションバー』などと呼ばれます。以下の画像の部分ですね。
ここでツールの色々な設定を変更できます。選択しているツールによって項目が変わりますので、何かツールを使っていてちょっと違った設定にしたくなったらとりあえずこの部分を探してみると良いです。
では角ではなく枠の横の真ん中あたりにマウスのカーソルをあててドラッグしてみましょう。そうすると横幅だけ変更されたと思います。
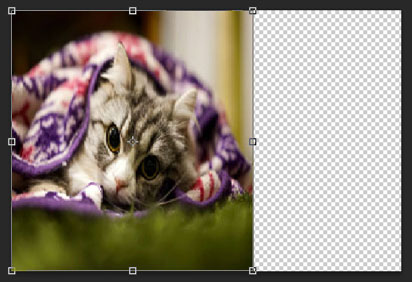
このように枠のどの位置でドラッグしたかで変更する項目を調節することができます。角にマウスカーソルを当てると縦横のサイズ、左右の枠の真ん中あたりだと横幅のみ、上下の真ん中あたりなら縦幅のみといった感じですね。
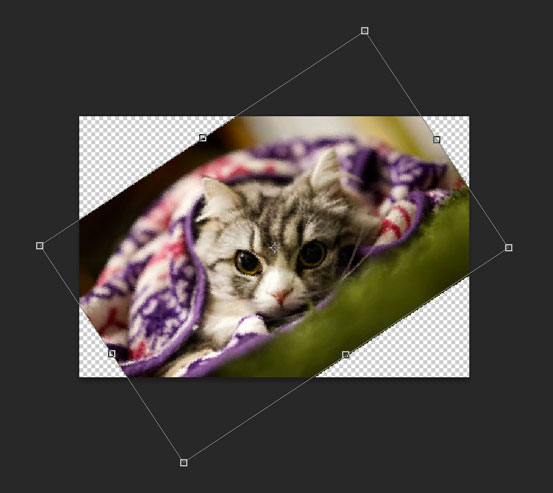
続いて画像の回転をしてみましょう。バウンディングボックスの角の外側あたりにマウスのカーソルを当ててみてください。するとマウスのカーソルが楕円形になったと思います。そのままドラッグしてみてください。画像を回転させることができると思います。枠の内側ではなく外側になるので間違えないようにしてください。
では続いて『Shift』キーを押しながらの『バウンディングボックス』についてみていきましょう。『Shift』キーを押しながら角にマウスカーソルを当ててドラッグすると縦横の比率をキープしたまま(アスペクト比をキープしたまま)大きさを変更することができます。
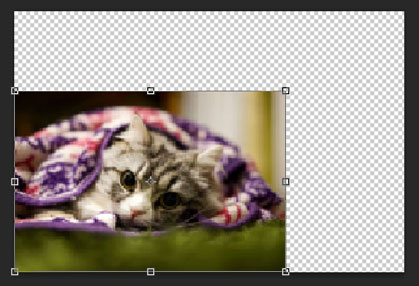
ちなみにこの『Shift』キーは角のドラッグ時のみの機能となります。上下左右の真ん中のドラッグでは『Shift』キーを押しても何も変化はありませんのでご注意ください。
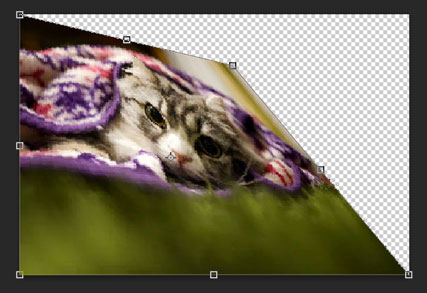
続いて『Ctrl』キー、もしくは『command』キーを押しながらのドラッグです。これは『自由変形』での大きさ変更となります。『Ctrl』キー、もしくは『command』キーを押しながら角、もしくは上下左右の真ん中あたりをグリグリとドラッグしてみてください。以下のように画像を自由に歪ませることができます。
というわけで『バウンディングボックス』の使い方は以上となります。ささっと画像などの大きさを変更したい場合に便利なので覚えてしまいましょう。『バウンディングボックス』は『移動ツール』を選択して『バウンディングボックスを表示』にチェックが入っていないと表示されませんのでそこは注意してください。
続いての記事ではレイヤーについて勉強していきたいと思います。引き続き頑張っていきましょう。ではー。
This article was written by Sakurama.

Author's beloved small mammal |
桜舞 春人 Sakurama HarutoA Tokyo-based programmer who has been creating various content since the ISDN era, with a bit of concern about his hair. A true long sleeper who generally feels unwell without at least 10 hours of sleep. His dream is to live a life where he can sleep as much as he wants. Loves games, sports, and music. Please share some hair with him. |
If you find any errors or copyright issues, please contact us.