シェアする
シェアする
Using Selection Tools - Japanese Only
みなさまどうも。
続きまして『選択範囲』というものを使ってみましょう。
『選択範囲』は様々な使い方ができ非常に便利な機能なのですがちょっと用途の幅が広すぎるので今回の記事では選択範囲の基本的な操作や、選択範囲を使用した画像(レイヤー)のコピーと切り抜きの方法などを解説していきたいと思います。
というわけで適当に画像とかをPhotoshopで開いてみましょう。0から新規ファイルを作成する場合は分かりやすいように全体を何かしらの色で塗りつぶしてしまうようにしてください。続いて以下のツールを選択しましょう。

上記のツールは『長方形選択ツール』と呼びます。ではこれを選択した状態で適当に画像の上あたりをドラッグしてみましょう。以下は灰色で塗りつぶしたレイヤーです。
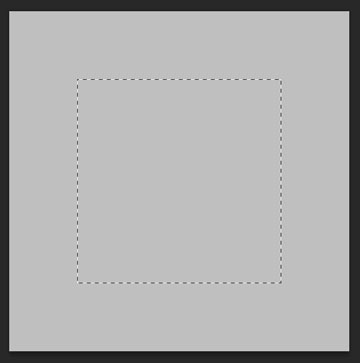
なんだか点線が現れましたね。これが『選択範囲』です。この選択範囲を使用してちょいと加工をしてみましょう。
『長方形選択ツール』を選択した状態で『選択範囲』の上で右クリックをし、出てきたメニューの中にある『選択範囲をコピーしたレイヤー』と選択してみます。
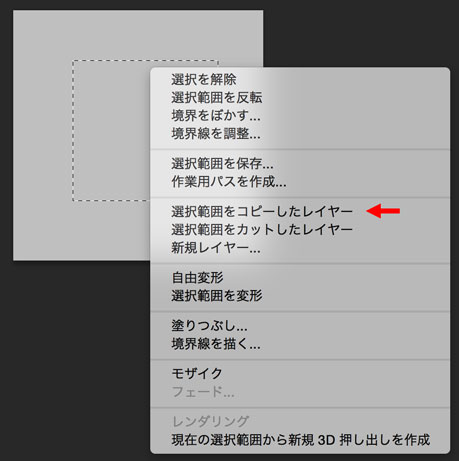
すると以下のようにレイヤーが増えます。
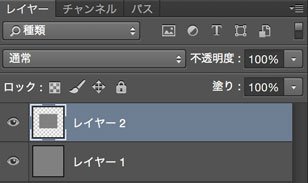
その増えたレイヤーを確認してみてください。元々のレイヤーのお目々のマークをクリックして非表示にしてみるとこうなっています。
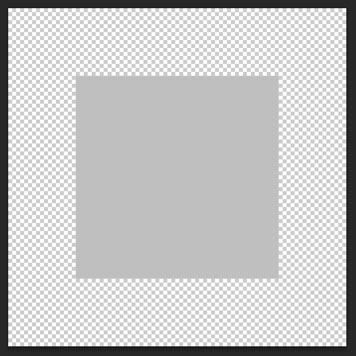
先ほどの選択範囲の部分がコピーされた状態のレイヤーが作成されました。
続いてちょっとヒストリーを使って作業内容を選択範囲を作成した時点へ戻し、もういっちょ『選択範囲』の上で右クリックをし、出てきたメニューの中にある『選択範囲をカットしたレイヤー』と選択してみましょう。するとこのようなレイヤーの構成になります。
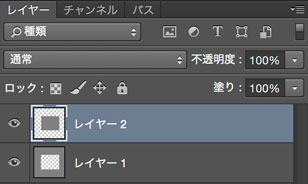
各レイヤーを確認してみるとこうなっています。
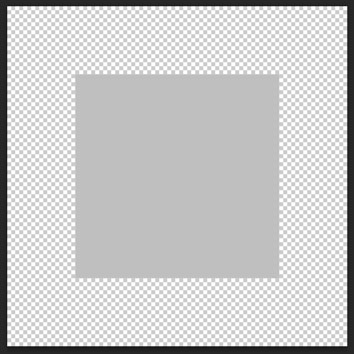
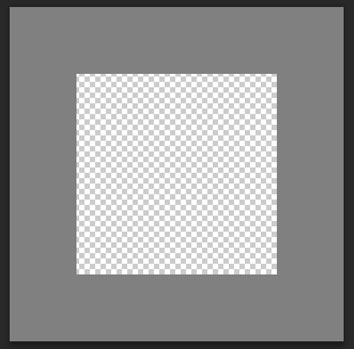
先程は選択部分がコピーされたレイヤーが作成されるだけで元のレイヤーに影響はありませんでしたが、今度は選択部分がコピーされたレイヤーが作成されると同時に元のレイヤーの選択部分がくり抜かれていますね。
こんな感じで選択範囲を使用すると画像(レイヤー)の一部をコピーしたりくりぬいたりすることができます。選択範囲は色々な使い方ができる機能ですが、このコピーと繰り抜きの方法は知っておくと非常に便利ですので覚えておくと良いです。ウェブ素材を作成する際は画像を繰り抜いたりする場面が結構多かったりします。
続きまして選択範囲そのものについての操作を色々と覚えていきましょう。
まず紹介したいのが『楕円形選択ツール』というツールです。先程は長方形の選択範囲を作成しましたが、『楕円形選択ツール』を使用すれば楕円形の選択範囲を作成することが可能です。
先ほどのツールパネルの『長方形選択ツール』を長めにクリックしてみてください。すると以下のように他のツールが展開されますのでその中の『楕円形選択ツール』を選択してください。
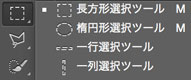
そのまま画像とかレイヤーの上でドラッグをしてみましょう。以下のように楕円形の選択範囲が作成できたかと思います。楕円形の選択範囲も長方形の選択範囲も使い方はほぼ同じです。
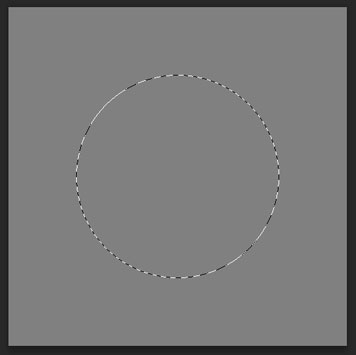
正方形や正円形の選択範囲を作成したい場合は『長方形選択ツール』もしくは『楕円形選択ツール』を選択した状態で『shift』キーを押しながらドラッグをすればOKです。
その際はオプションバーの『スタイル』の項目が『標準』となっている必要がありますのでその点は注意しましょう。
大きさを指定した状態で選択範囲を作成したい場合は上のオプションバーに注目しましょう。『長方形選択ツール』もしくは『楕円形選択ツール』を選択した状態だと以下のような状態になっているかと思います。

この中の『スタイル』と『幅』と『高さ』の項目で選択範囲の大きさなどを調整できます。
デフォルトの状態の『スタイル』の項目は『標準』が選択されていると思いますが、この状態は先程の選択範囲の作成時のようにドラッグした範囲がそのまま選択範囲として生成されるモードになります。
この『スタイル』の項目を『固定』に変更してみましょう。すると以下のように『幅』と『高さ』が選択できるようになります。試しに幅と高さを『100px』に指定してみましょう。

この状態で適当にドラッグをしてみてください。すると以下のように横100px、高さ100pxで選択範囲が作成できます。
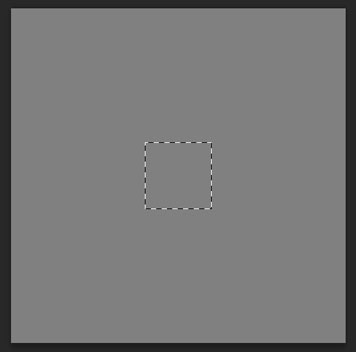
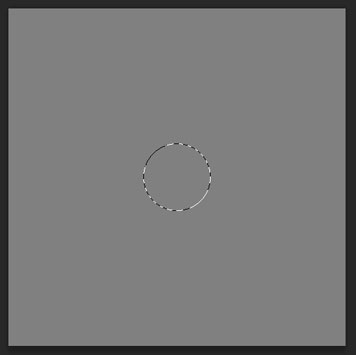
上記は『長方形選択ツール』で作成しましたが『楕円形選択ツール』で幅と高さを『100px』に指定すると直径100pxの正円形の選択範囲が生成できます。
続いて『スタイル』の項目を『縦横比を固定』と選択してみます。この状態の『幅』と『高さ』には『0.001』から『999.999』の値が入力できます(Photoshop CCの場合)。単位はいりません。値を入力するとその比率の選択範囲が生成できます。例えば『16:9』で選択範囲を作成したい場合は以下のように入力します。

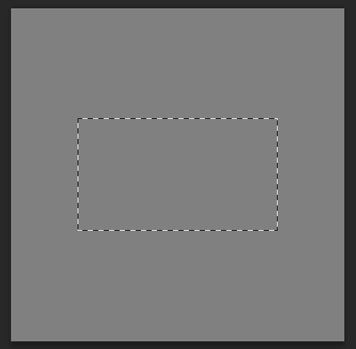
注意すべき点として縦横が固定というわけではなくあくまでも縦横比が固定、となりますのでドラッグした分だけ大きさが変動します。大きさを完全に指定したい場合は『縦横比を固定』ではなく『固定』を使用するようにしましょう。
続いてオプションバーの左端の部分の項目を使用してみたいと思います。以下の部分ですね。4つのアイコンが並んでいます。
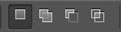
ここでは生成した選択範囲をどのように扱うかを選択できます。選択範囲を新たに作成したり追加したり一部分を削除したりといった感じですね。
では早速使ってみましょう。多分デフォルトの状態だと以下のアイコンが選択状態になっているかと思います。

これは選択範囲を新規で作成するモードに切り替えるアイコンです。例えば以下のように適当に選択範囲を作成した状態で
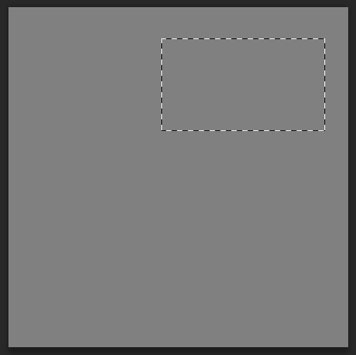
新たに選択範囲を作成しようとすると元々存在していた選択範囲が消えて新しい選択範囲のみが残ります。
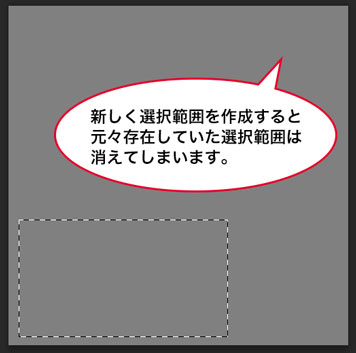
ではここでアイコンを左から二番目のやつに変更してみましょう。以下の画像のやつですね。このアイコンを選択すると選択範囲を追加で生成するというモードに切り替わります。

ちょっと試してみましょう。選択範囲がすでに生成されている以下の画像の状態で
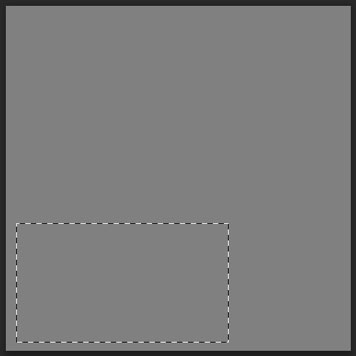
さらに右上辺りに適当にドラッグしてみると
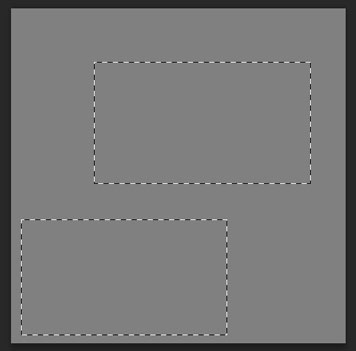
こんな感じになります。いかがでしょうか。選択範囲が追加されたのが確認できたと思います。
ちなみに元々存在している選択範囲にかぶさる形でドラッグをすると以下のような感じで追加した部分がくっついた形の選択範囲が生成されます。
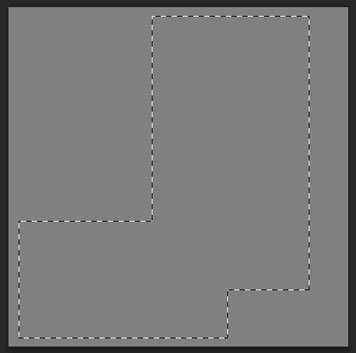
続いてその隣のアイコンを選んでみましょう。以下の画像のやつですね。

これは現在の選択範囲から一部を削除するモードに切り替えるアイコンになります。軽く試してみましょう。適当に選択範囲を生成した以下の画像の状態で
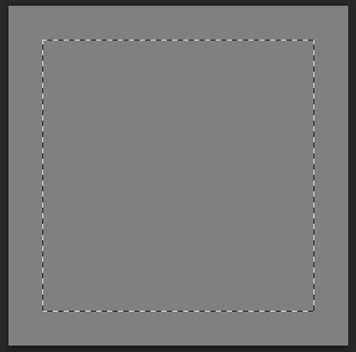
先ほどのアイコンを選択して生成された選択範囲の中を適当にドラッグしてみると
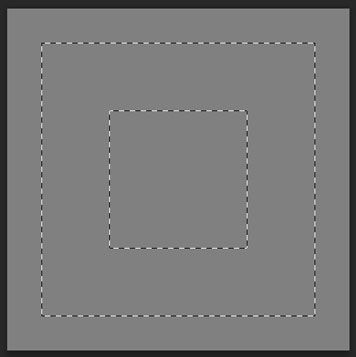
こんな感じになります。少々分かりづらいのでそのまま選択範囲を右クリックして『選択範囲をコピーしたレイヤー』と選択してみます。生成された新規レイヤーを確認してみましょう。
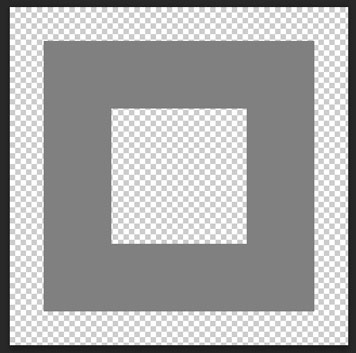
いかがでしょうか。ちゃんと選択範囲が繰り抜かれているのが確認できたと思います。
注意点として先ほどの選択範囲をくり抜くアイコンを選択した時点で選択範囲がひとつも存在していない場合、選択範囲をくり抜くアイコンを選択した状態であるにも関わらず『選択範囲を新規作成するモード』になってます。その後、適当に選択範囲を生成すると『選択範囲をくり抜くモード』に切り替わります。この挙動が少々ややこしいので注意しましょう。
続いて最後のアイコンです。以下の画像ですね。これは重なった部分の選択範囲だけを残すモード切り替えるアイコンになります。

では早速つかってみましょう。適当に選択範囲を作って
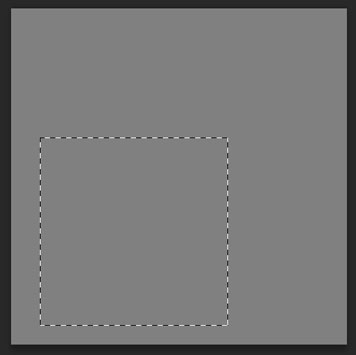
作成した選択範囲に重なるように適当にドラッグすると
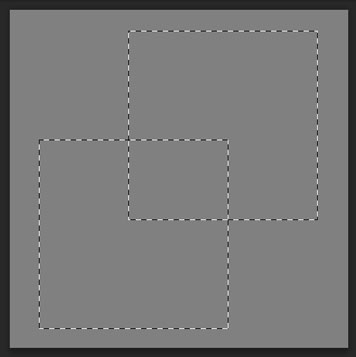
こんな感じになります。
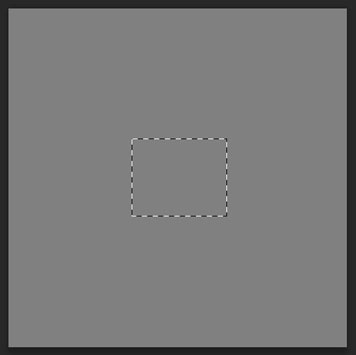
重なった部分だけが残っていますね。これがこのアイコンを選択したときの挙動になります。イメージ通りの動きになるので大方問題ないかと思います。
ちなみにこちらもアイコンを選択した状態で選択範囲がひとつも存在しないときは『選択範囲を新規作成するモード』になってます。こちらも注意するようにしてください。
オプションバーの項目の『ぼかし』に値を入力すると選択範囲の境界線にぼかしを加える事ができます。
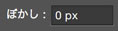
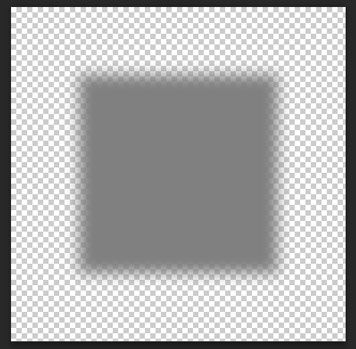
実際に使ってみるとこのような感じになります。以下は『ぼかし』に10pxを指定して青一色のレイヤーをくり抜いています。
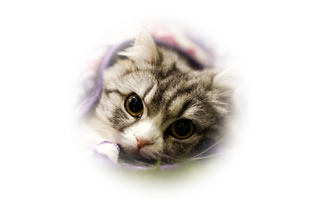
以下の画像のようにぼかしをいれつつ写真をくり抜くと結構おしゃれです。良ければ使ってみてください。
選択範囲を作成してその選択範囲の上で右クリックをし、『塗りつぶし...』と選択すると選択範囲の中のみを塗りつぶすことができます。
その他『境界線を描く…』と選択すると選択範囲の枠にそって境界線が描けたり、『自由変形』や『選択範囲を変形』を選択するとそのまま変形させたりできます。
『自由変形』は画像(レイヤー)を含めた変形、『選択範囲を変形』は選択範囲のみの変形となります。
とても便利なのでこちらも覚えておきましょう。
選択範囲を削除したい場合は上のメニューバーの『選択範囲』の中の『選択を解除』という項目を選択すればOKです。
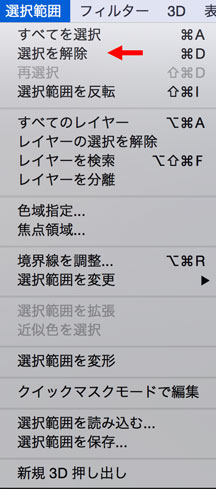
ショートカットキーで行う場合、『Ctrl』もしくは『command』を押しながら『D』を押せば選択範囲を消すことができます。
選択範囲の作成履歴も『ヒストリー』に記憶されますので作業を戻したい場合は『ヒストリー』を使用するようにしましょう。
※ヒストリーについてはこちらを参照
今現在表示している選択範囲の大きさを知りたい場合は『情報パネル』を使用すると便利です。
Photoshopの上のメニューバーの『ウィンドウ』の中の『情報』というのをクリックしてみてください。そうすると以下のパネルが出てきます。
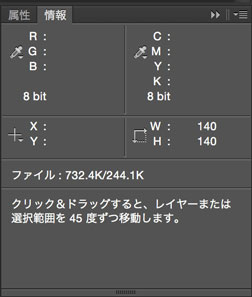
適当に選択範囲を作成してみましょう。すると以下の赤矢印の部分に数値が出てきます。
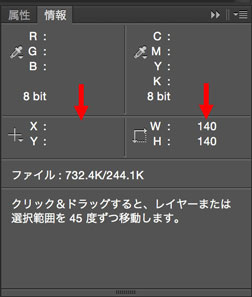
ここで選択範囲の位置や大きさを知ることができます。『X』がX座標、『Y』がY座標、『W』が横幅、『H』が高さです。
PhotoshopデータからHTMLとCSSをマークアップする際に隙間の大きさを調べる必要があったりします。その際は選択範囲と情報パネルを使って大きさを測ると良いです。覚えておきましょう。
というわけで長くなりましたが以上となります。少し慣れないと使いドコロが難しいかもしれませんが頑張っていきましょう。
続いての記事では文字の打ち込みをやっていきたいと思います。ではまたお会いしましょう。
This article was written by Sakurama.

Author's beloved small mammal |
桜舞 春人 Sakurama HarutoA Tokyo-based programmer who has been creating various content since the ISDN era, with a bit of concern about his hair. A true long sleeper who generally feels unwell without at least 10 hours of sleep. His dream is to live a life where he can sleep as much as he wants. Loves games, sports, and music. Please share some hair with him. |
If you find any errors or copyright issues, please contact us.