シェアする
シェアする
Paint Bucket and Eyedropper Tools - Japanese Only
みなさまどうも。
続きまして『塗りつぶし』とか『スポイトツール』とかやっていきましょう。
まずは『塗りつぶし』ですね。『塗りつぶし』とはレイヤーとか背景を全部塗りたくる事を指します。
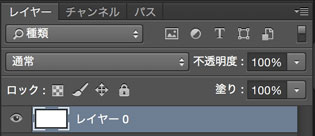
というわけでまた適当にPhotoshopで画像を開いたり新規ファイルを作成してみてください。開きましたら右下のレイヤーの項目で適当なレイヤーをクリックして選択状態にします。以下のようにレイヤーの部分が反転表示されてれば選択しているということになります。
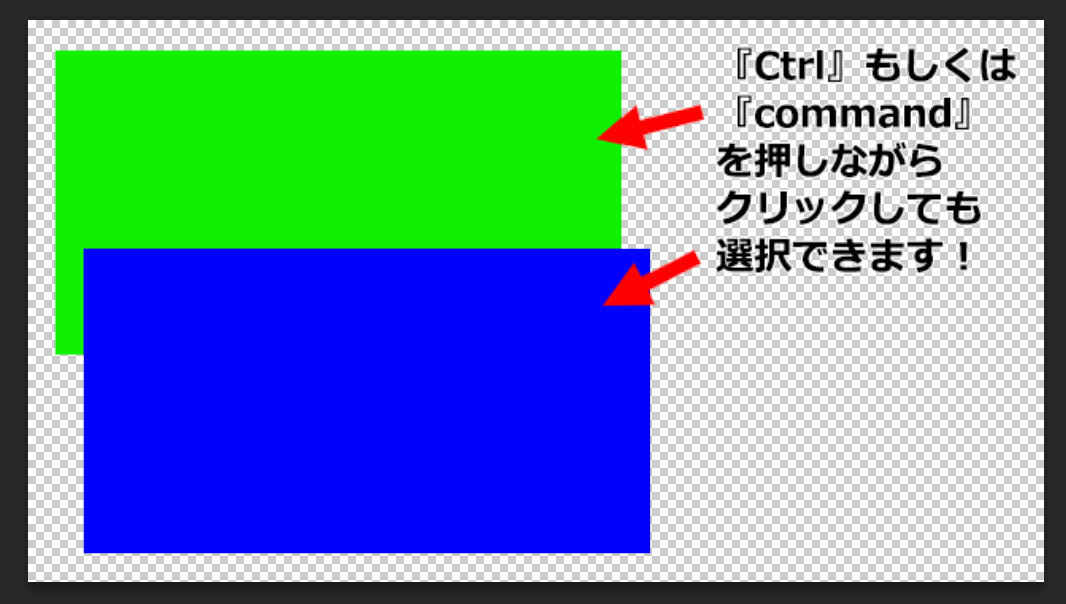
ちょっと前の記事でも紹介しましたが、『移動ツール』を選択した状態で『Ctrl』もしくは『command』を押しながら作業領域の画像部分をクリックするとそのレイヤーを選択することができます。『移動ツール』を選択した状態でクリックする必要がありますのでそこはご注意ください。
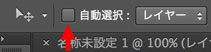
そして『移動ツール』の上の方の『ツールオプションバー』に『自動選択』という項目があります。こちらにチェックを入れると『Ctrl』もしくは『command』を押す必要なくなり、クリックしただけで選択できるようになります。
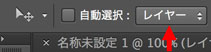
以下の項目でクリックした部分の『レイヤー』を選択するモードと、そのレイヤーが内包されている『グループ』を選択するモードに切り替えができます。基本的に『レイヤー』にしておいた方が使いやすいですが、クリックしたレイヤーの所属しているグループを選択したいときに便利なのでこちらも覚えておきましょう。
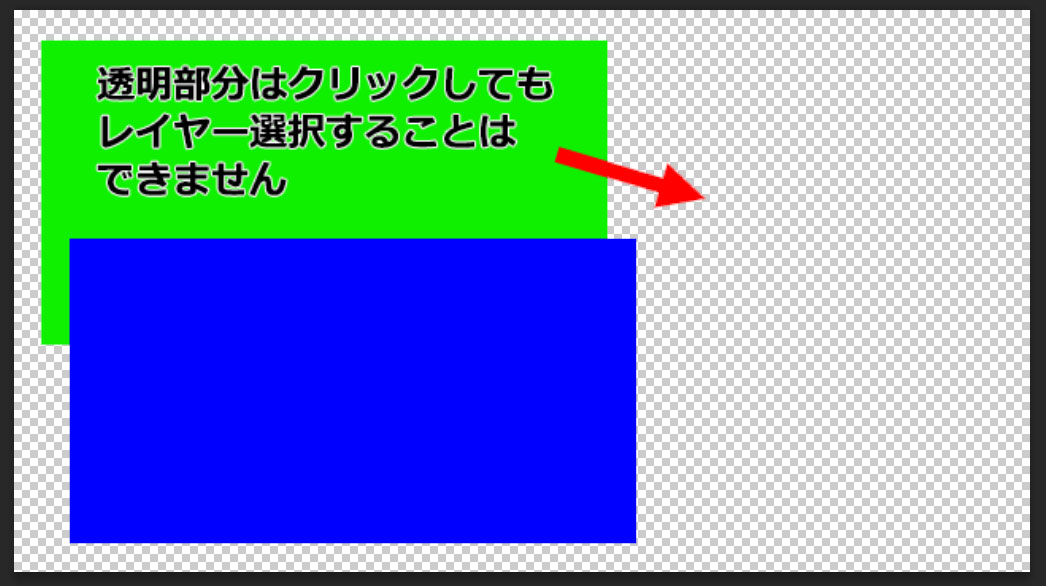
ちょっと注意点となりますが『透明』の部分をクリックした場合はレイヤーやグループの選択はできません。何かしらの色が付いた部分をクリックする必要がありますのでご注意ください。
レイヤーを選択状態にしたら上のメニューバーの『編集』の中にある『塗りつぶし』を選択してみましょう。すると以下のような画面が出てきます。
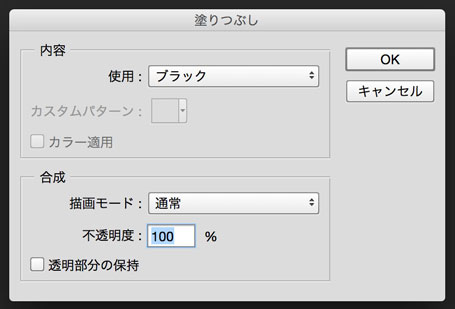
そしたら『使用』というところでお好きな色を選択してみましょう。ここでは『描画色』、『ホワイト』、『ブラック』などを選択できます。デフォルトの項目にない色を塗りたかったら『カラー』を選択すれば『カラーピッカー』を出すことができますのでここで自由に色を設定することができます。以下の画面ですね。
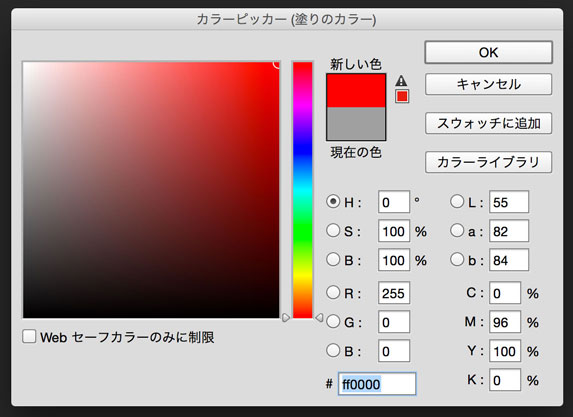
色を適当に選択しましたらそのまま『OK』をクリックしてください。指定した色で全て塗りつぶされたかと思います。
その他、『不透明度』も設定することができます。これは塗りつぶす色に透明度を設定出来る項目です。例えば青色に不透明度50%を設定して塗りたくると以下のような感じになりますね。

元のレイヤー(画像)に半透明な青色を重ねた感じになりました。続いて下のほうに『透明部分の保持』という項目があるかと思います。これにチェックを入れると元のレイヤーの透明のところは無視して塗りたくってくれます。ちょっと試してみましょう。以下の画像をみてください。
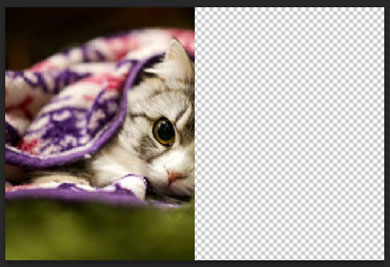
先ほどの画像の半分くらいを消しゴムツールで消して透明にしてみました。さてこれを『透明部分の保持』にチェックをいれて塗りつぶしてみると
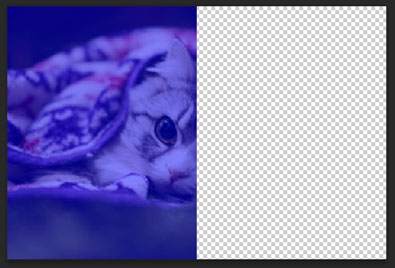
こんな感じで透明じゃない部分だけ(色のついた部分だけ)塗りつぶしてくれていますね。これも結構便利なので覚えておいて下さい。
ただし全体が透明のレイヤーを塗りつぶしたいといったときに『透明部分の保持』にチェックが入っているとまったくさっぱり塗りつぶしができません。「塗りつぶしができねえぜ…」となってしまったら『透明部分の保持』の項目を確認するようにしてください。多分それで直ります。
最後に『描画モード』という項目があります。これは塗りつぶすときの『合成』について指定する項目となります。解説するとすると内容が長くなってしまいますので当記事では割愛しますが、写真をセピア調に変えたり写真に文字を入れるときに自然と合成できたりと中々便利なので色々試してみると楽しめるかもしれません。単純な塗りつぶしを行いたい場合は『通常』を選択するようにすればOKです。
というわけで『塗りつぶし』について以上となります。
続いて『スポイトツール』になりますね。これは指定した部分の色を抽出してくれるツールです。ウェブ素材を作成したり、PhotoshopデータからHTMLに書き起こしをしたりする場合にその部分の色が知りたいという時が多々あります。そんな時に『スポイトツール』が大活躍します。
まず『スポイトツール』の場所ですが、左側あたりのツールパネルのところに以下のアイコンがあるかと思います。

これがスポイトツールになりますね。これを選択してみましょう。するとスポイトのアイコンに変更になったと思います。この状態で適当に色の付いている部分をクリックしすると
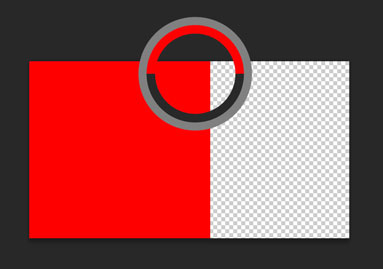
こんな感じで色を抽出してくれます。スポイトツールを選択した状態でクリックをすると上記のような半円が出てきますが、上半分が今選択した色、下半分が元々選択した色になります。色の抽出が終わった段階で『描画色』にその色が反映されていますのでウェブカラーなどを知りたい場合は左下の描画色のところをクリックします。以下の部分ですね。
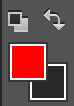
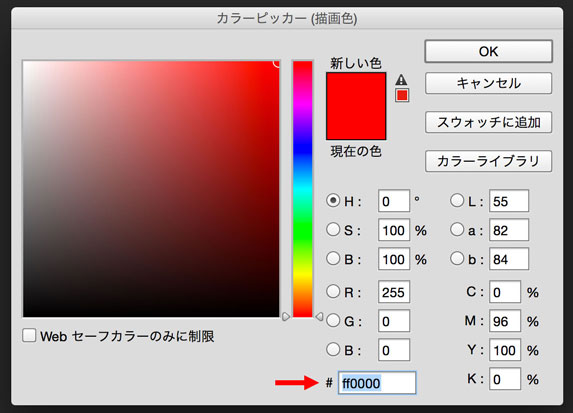
そしていつものカラーピッカーを開きましょう。すると下の方にウェブカラーが載っていますのでここを丸コピすればOKです。以下の赤い矢印のところですね。
そしてスポイトツールで抽出した色を『背景色』の方に反映させたい、といった場合には右側あたりにある『カラーパネル』に注目してください。以下の部分ですね。
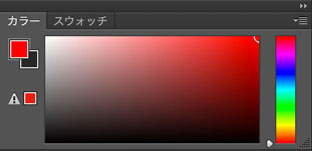
もし『カラーパネル』が見つからない、といった場合にはメニューバーの『ウィンドウ』の中の『カラー』にチェックをいれれば出てきます。
その中の左側に以下の画像の部分がありますよね。ここで『描画色』と『背景色』を切り替えられますのでクリックしてみましょう。微妙な変化なのでよくみないとわからないのですが以下が『描画色』を選択した状態で

以下が『背景色』を選択した状態です。

微妙に黒いような灰色のような枠が切り替わっているのが確認できると思います。ここの切り替えでスポイトツールに反映させたい色を変更できますので試してみてください。「スポイトツールで抽出した色が背景色に反映されちゃってどうしよう」という状態になったら上記のカラーパネルの設定を思い出すと幸せになれるかもしれません。
そして『ブラシツール』を選択している状態で『Alt』もしくは『option』を押すと押している間は『スポイトツール』選択状態となります。Photoshopで絵を描いていたり素材を作成しているときに色を抽出したい場面が多々ありますが、このショートカットを覚えておくと作業効率が上がって良い感じです。ちなみに『移動ツール』とかを選択している状態では『Alt』もしくは『option』を押しても『スポイトツール』は呼び出せませんので注意です。
というわけで『塗りつぶし』と『スポイトツール』については以上となります。続いてはガイドとか解説していきたいと思いますので引き続き頑張っていきましょう。ではー。
This article was written by Sakurama.

Author's beloved small mammal |
桜舞 春人 Sakurama HarutoA Tokyo-based programmer who has been creating various content since the ISDN era, with a bit of concern about his hair. A true long sleeper who generally feels unwell without at least 10 hours of sleep. His dream is to live a life where he can sleep as much as he wants. Loves games, sports, and music. Please share some hair with him. |
If you find any errors or copyright issues, please contact us.