[Setup] SQL Execution Environment
This page explains how to set up a SQL development environment. SQL is a language for working with databases. Options range from the lightweight SQLite to full-featured MySQL and PostgreSQL.
Getting Started with SQLite (Easiest)
SQLite is a lightweight database that requires no server installation. It is ideal for learning or quick experiments.
| OS | Installation Method |
|---|---|
| macOS | SQLite ships with macOS — no extra installation needed. |
| Linux | Use sudo apt install sqlite3 on Ubuntu / Debian or sudo dnf install sqlite on Fedora / RHEL-family. |
| Windows | Download sqlite-tools-win-x64-XXXX.zip from sqlite.org, extract it, and add that folder to PATH. |
Installing SQLite on Windows
Open sqlite.org/download.html. Under the Precompiled Binaries for Windows section, download sqlite-tools-win-x64-XXXXXXX.zip. The digits in the filename depend on the current release.

Right-click the ZIP and choose Extract All. Extract to a short, space-free path such as C:\sqlite. Inside the extracted folder you'll find four executables: sqlite3.exe (the main SQLite CLI), sqldiff.exe (shows the differences between two databases), sqlite3_analyzer.exe (analyzes the structure and statistics of a database file), and sqlite3_rsync.exe (syncs a remote SQLite database in an rsync-like fashion). You'll mostly use sqlite3.exe; the other three are for specific use cases.
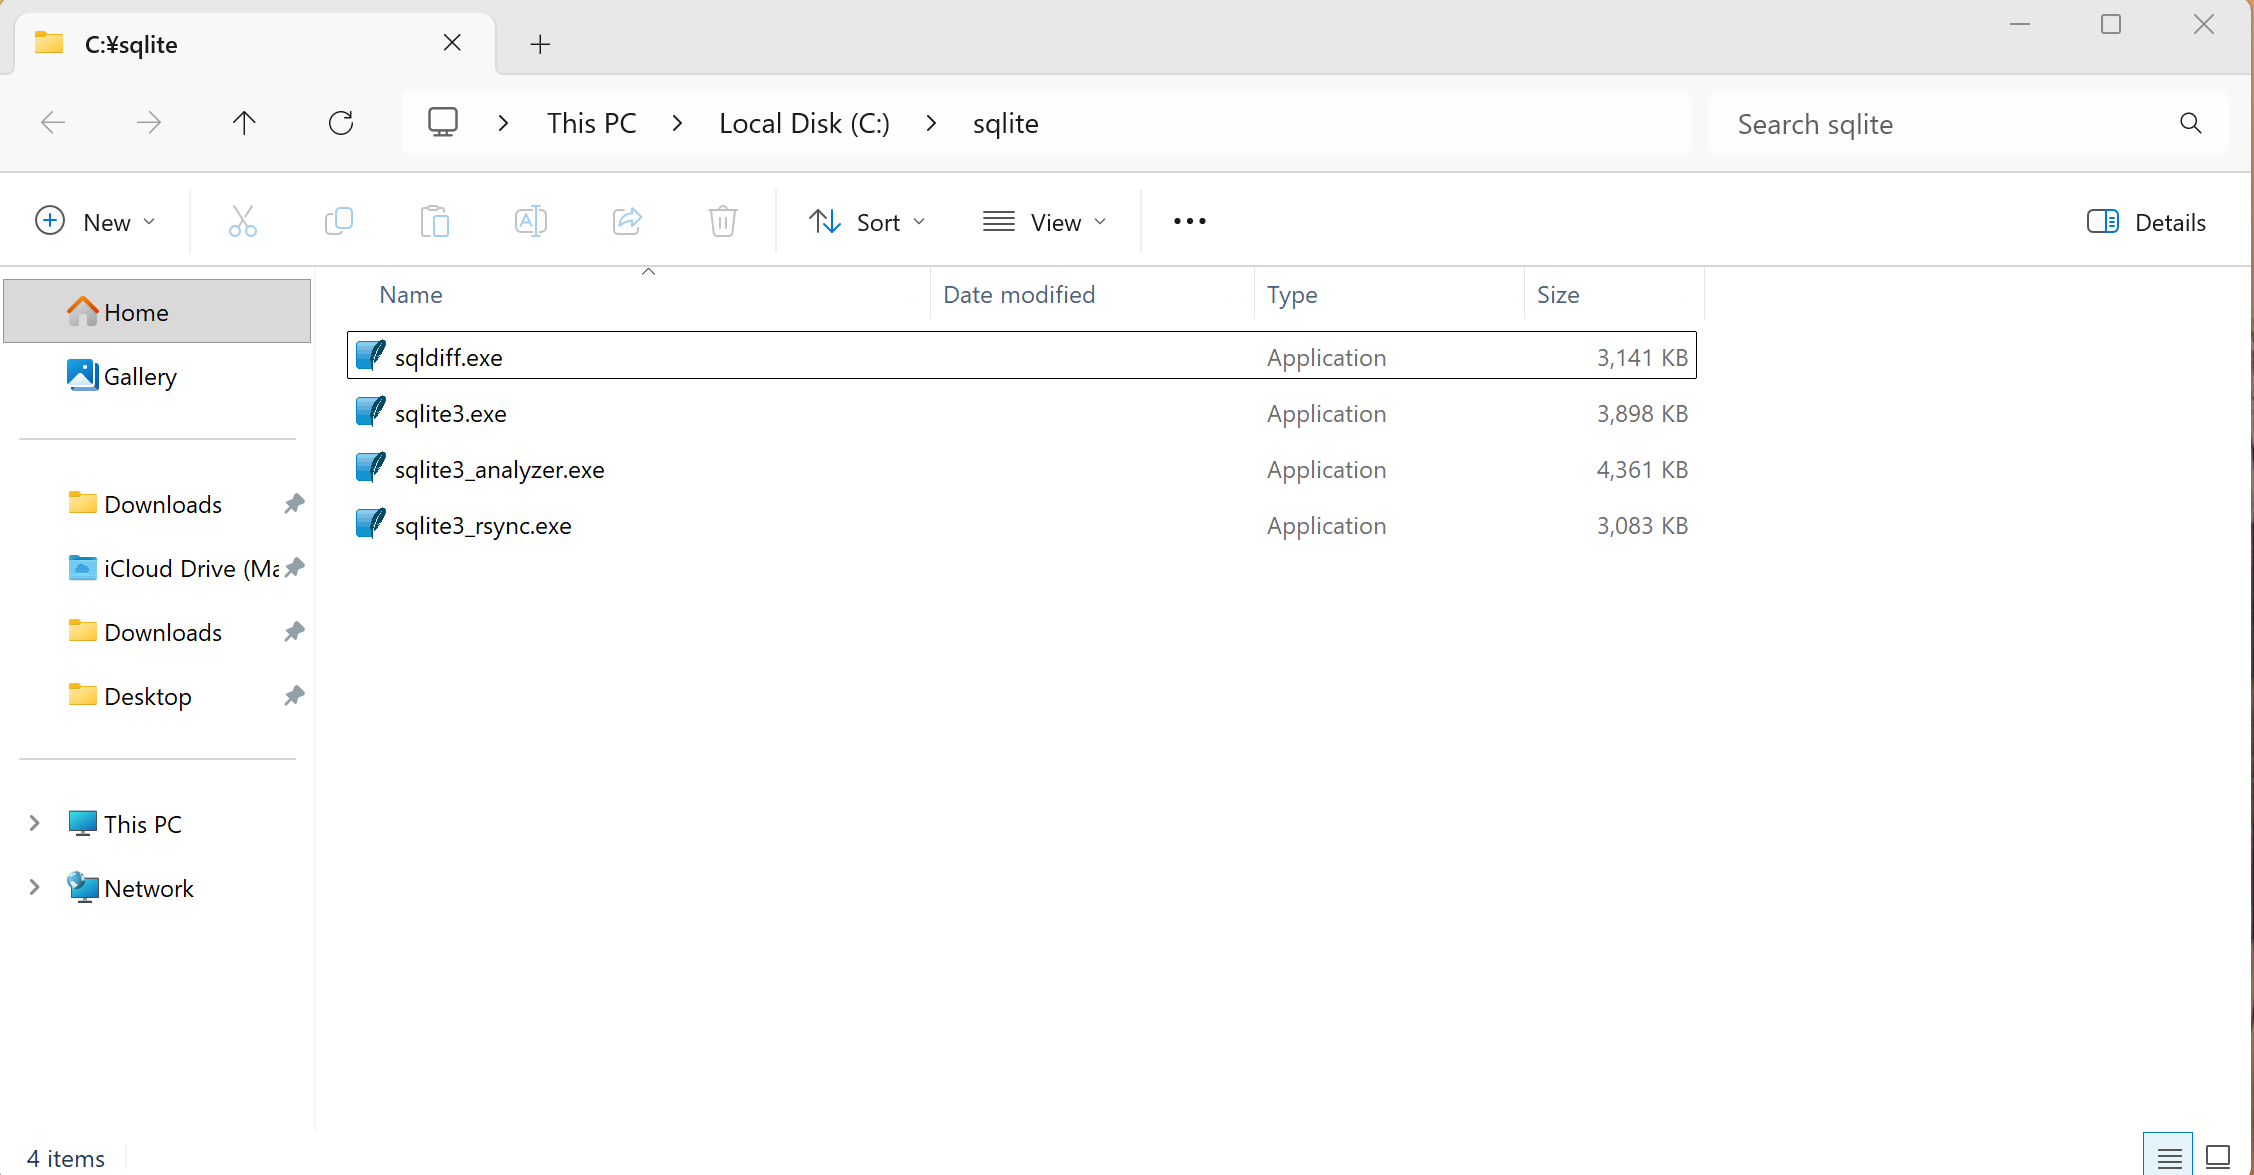
* In Windows 11's File Explorer, the address bar shows the path in breadcrumb style such as This PC > Local Disk (C:) > sqlite. To see it as a plain text path like C:\sqlite, click the address bar (or press Ctrl + L) and it will switch to text display.
Type Environment Variables in the Start Menu search and open Edit the system environment variables. Click Environment Variables..., select Path, click Edit → New, and add C:\sqlite.
After that, reopen PowerShell or Command Prompt and verify:
sqlite3 --version
3.53.0 2026-04-09 11:41:38 4525003a53a7fc63ca75c59b22c79608659ca12f0131f52c18637f829977f20b (64-bit)
* The version number at the start (3.53.0 here) is followed by a date/time and a hash value (4525003a...) that vary depending on the release you downloaded. The trailing (64-bit) indicates the build's bitness and does not affect SQLite's behavior.
Checking the version
On macOS / Linux / Windows, you can check the installed version with:
sqlite3 --version
3.43.2 2023-10-10 12:17:52 ...
Interactive mode
Run the following command in a terminal to launch SQLite's interactive mode.
sqlite3 test.db
You can enter and execute SQL in the interactive mode.
Create a table.
CREATE TABLE users (
    id INTEGER PRIMARY KEY,
    name TEXT NOT NULL,
    age INTEGER
);
Insert data.
INSERT INTO users (name, age) VALUES ('Ayanami Rei', 14);
INSERT INTO users (name, age) VALUES ('Ikari Shinji', 14);
Query the data.
SELECT * FROM users;
Output:
1|Ayanami Rei|14
2|Ikari Shinji|14
Exit interactive mode.
.quit
Installing and Connecting to MySQL
MySQL is one of the most widely used databases. It's a common choice for web application development.
| OS | Installation Method |
|---|---|
| macOS | Run brew install mysql with Homebrew. Homebrew is a package manager for macOS; if not installed, follow the instructions at https://brew.sh/. |
| Linux | sudo apt install mysql-server on Ubuntu / Debian, sudo dnf install mysql-server on Fedora / RHEL. |
| Windows | Download MySQL Installer for Windows from the MySQL official site and run it. The GUI installer bundles MySQL Server, Workbench, Shell, and more. |
Installing MySQL on Windows
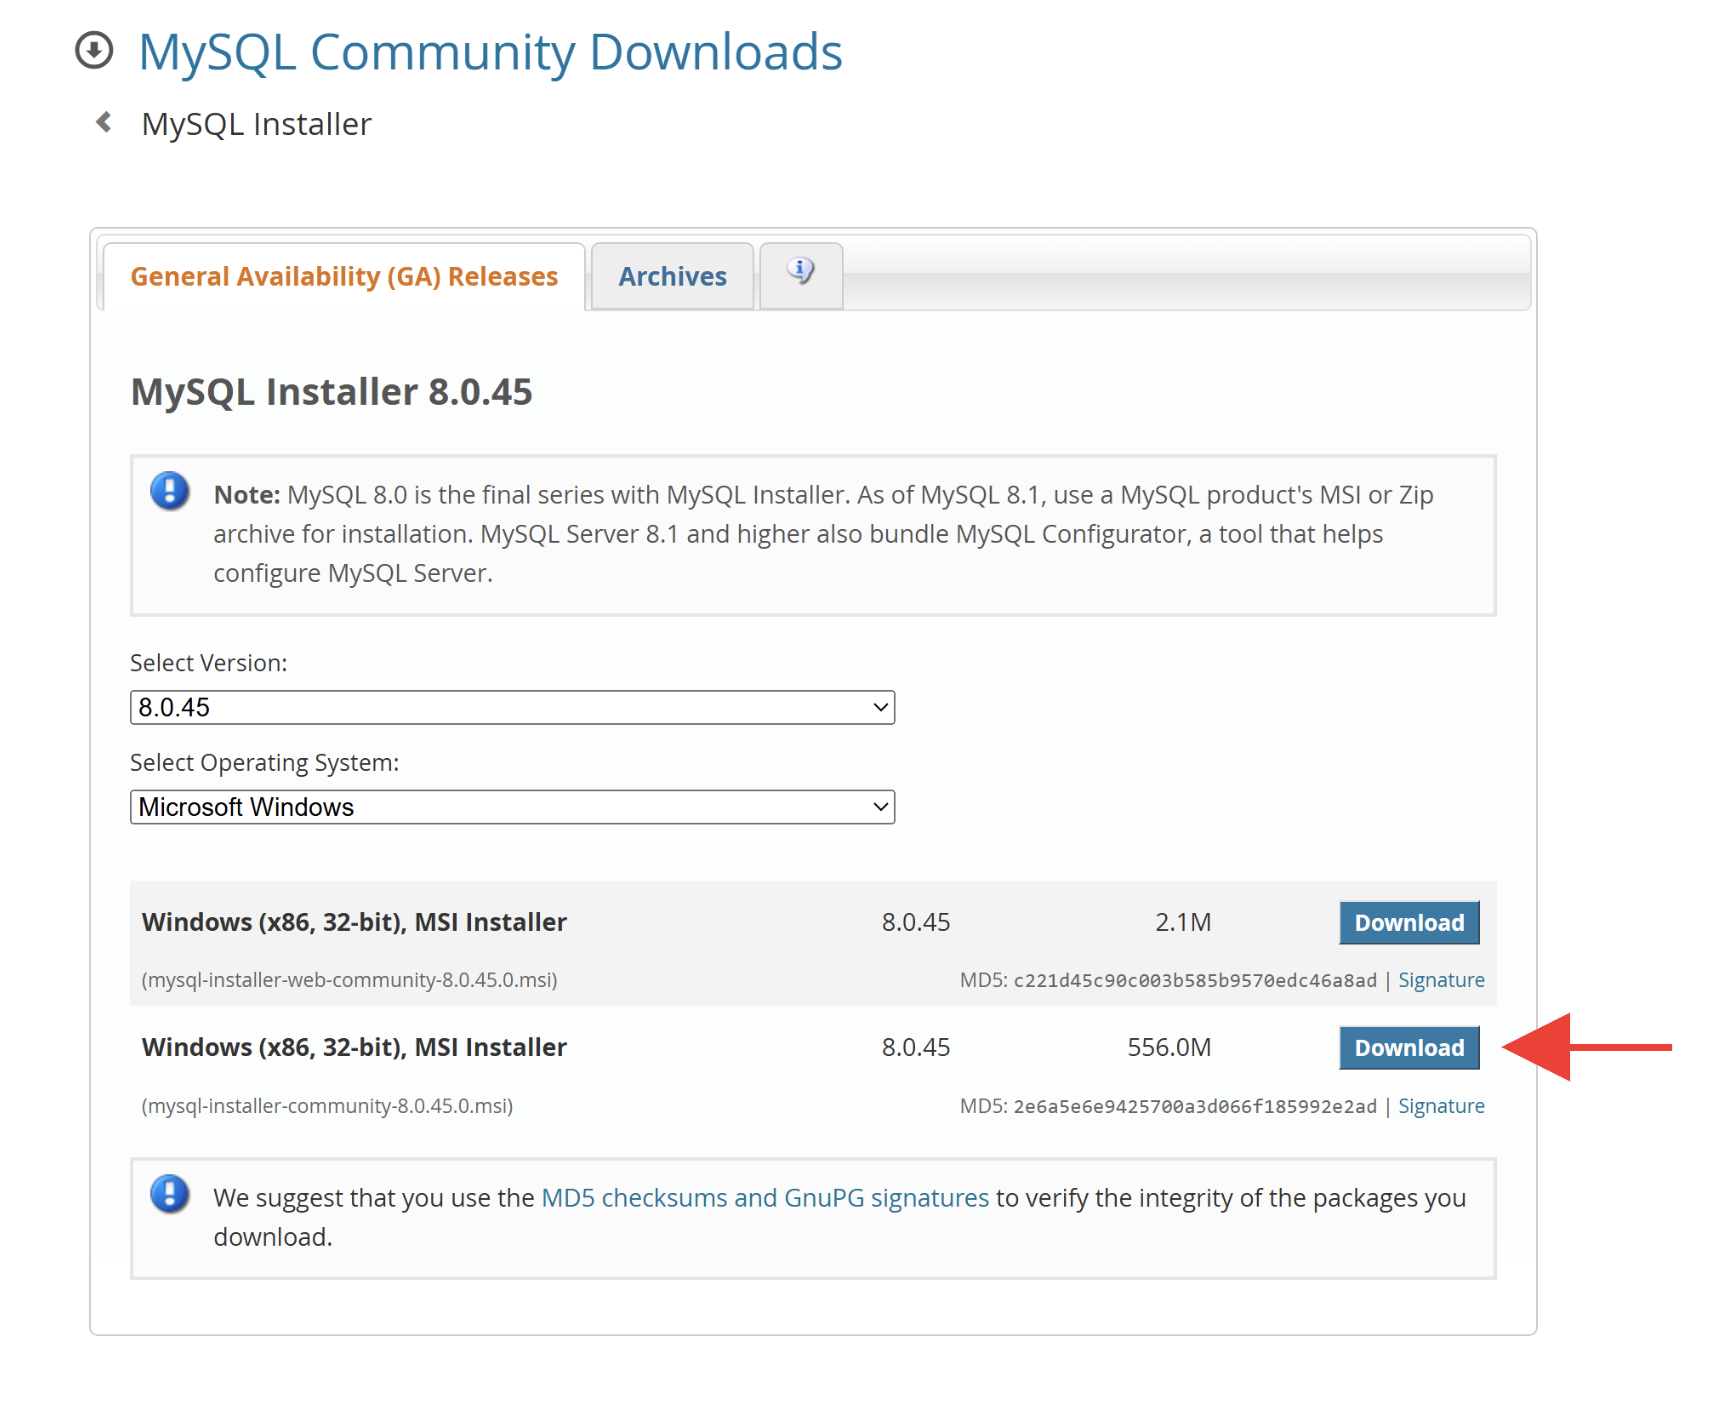
Open the MySQL Installer download page and download the MSI (mysql-installer-community-X.X.XX.X.msi). You'll be asked to sign in with an Oracle account, but you can skip that via the No thanks, just start my download. link at the bottom of the page.
Double-click the downloaded MSI. If a UAC (User Account Control) prompt appears, click Yes.
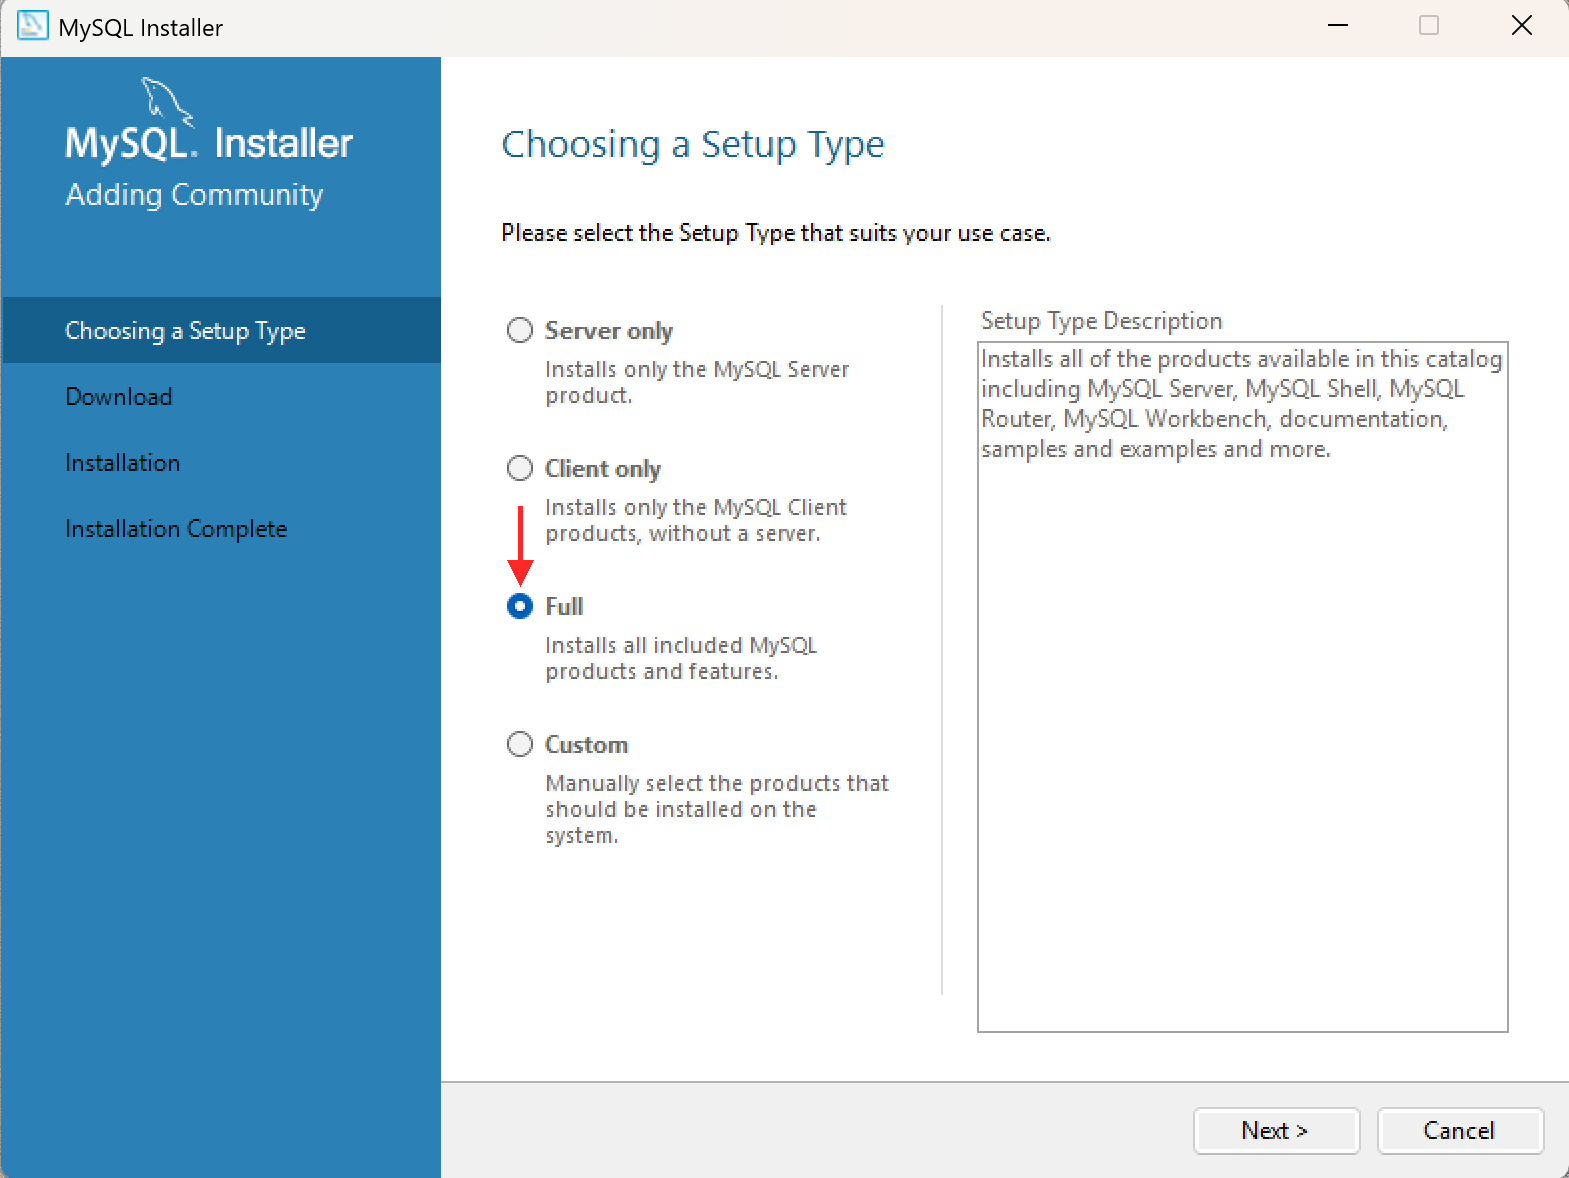
The Choosing a Setup Type screen offers four options: Server only, Client only, Full, and Custom. For learning purposes Full is recommended — it installs MySQL Server along with MySQL Workbench, MySQL Shell, and the relevant connectors in one go.
If a dependency-check screen appears (Visual C++ runtime, etc.), install the missing prerequisites and click Execute to continue.
Next comes the server configuration flow. Defaults are fine for most steps, but you'll be asked to set a root password — write it down somewhere safe. You can choose any string you like, and you'll enter it twice for confirmation.
For local testing, simple ones like root or password work fine. A Weak label may appear below the input, but you can continue anyway. For production use, set a strong password (a mix of uppercase, lowercase, digits, and symbols, 8 characters or more).

Once installation completes, verify from PowerShell or Command Prompt. The MySQL Installer sets the PATH automatically, so usually no extra setup is needed.
mysql --version
mysql  Ver 8.4.X for Win64 on x86_64 (MySQL Community Server - GPL)

Starting the server and connecting (macOS / Linux)
On macOS with Homebrew, start the server with the command below. On Windows, MySQL Installer registers the server as a Windows service that starts automatically, so this step isn't needed.
brew services start mysql
==> Successfully started `mysql` (label: homebrew.mxcl.mysql)
Connect to MySQL from the terminal. The -p flag prompts you for the password.
mysql -u root -p
Enter password: ********
Typing the password produces no visible output — that's by design. A Homebrew install might leave root without a password at first; in that case, just press Enter, or connect with mysql -u root.
Note: If you see Can't connect to local MySQL server through socket, the server might not be running. See this section.
Create and select a database.
CREATE DATABASE mydb;
Query OK, 1 row affected (0.01 sec)
USE mydb;
Database changed
From here, you can run standard SQL.
CREATE TABLE users (
    id INT AUTO_INCREMENT PRIMARY KEY,
    name VARCHAR(50) NOT NULL,
    age INT
);
Query OK, 0 rows affected (0.03 sec)
Type exit to leave interactive mode.
exit
Bye
Stop the server (macOS / Linux Homebrew or apt):
brew services stop mysql
Stopping `mysql`... (might take a while)
==> Successfully stopped `mysql` (label: homebrew.mxcl.mysql)
Uninstalling MySQL
Before uninstalling, if you want to wipe the data too, check where the data directory lives — this must be done before you uninstall, because you'll lose the ability to ask MySQL afterwards.
SELECT @@datadir;
/opt/homebrew/var/mysql/
On macOS, uninstall with Homebrew:
brew uninstall mysql
Then remove the data directory using the path you just noted.
rm -rf /opt/homebrew/var/mysql
On Windows, go to Settings → Apps → Installed apps and uninstall MySQL Server, MySQL Installer, and MySQL Workbench individually. To remove the data too, delete C:\ProgramData\MySQL (which is a hidden folder, so enable Show hidden files in File Explorer first).
Installing and Connecting to PostgreSQL
PostgreSQL is a powerful and reliable database. It shines on complex queries and large-scale systems.
| OS | Installation Method |
|---|---|
| macOS | After installing Homebrew, run brew install postgresql. |
| Linux | sudo apt install postgresql on Ubuntu / Debian, sudo dnf install postgresql-server on Fedora / RHEL. |
| Windows | Download the EDB installer from the PostgreSQL official site and run it. |
Installing PostgreSQL on Windows
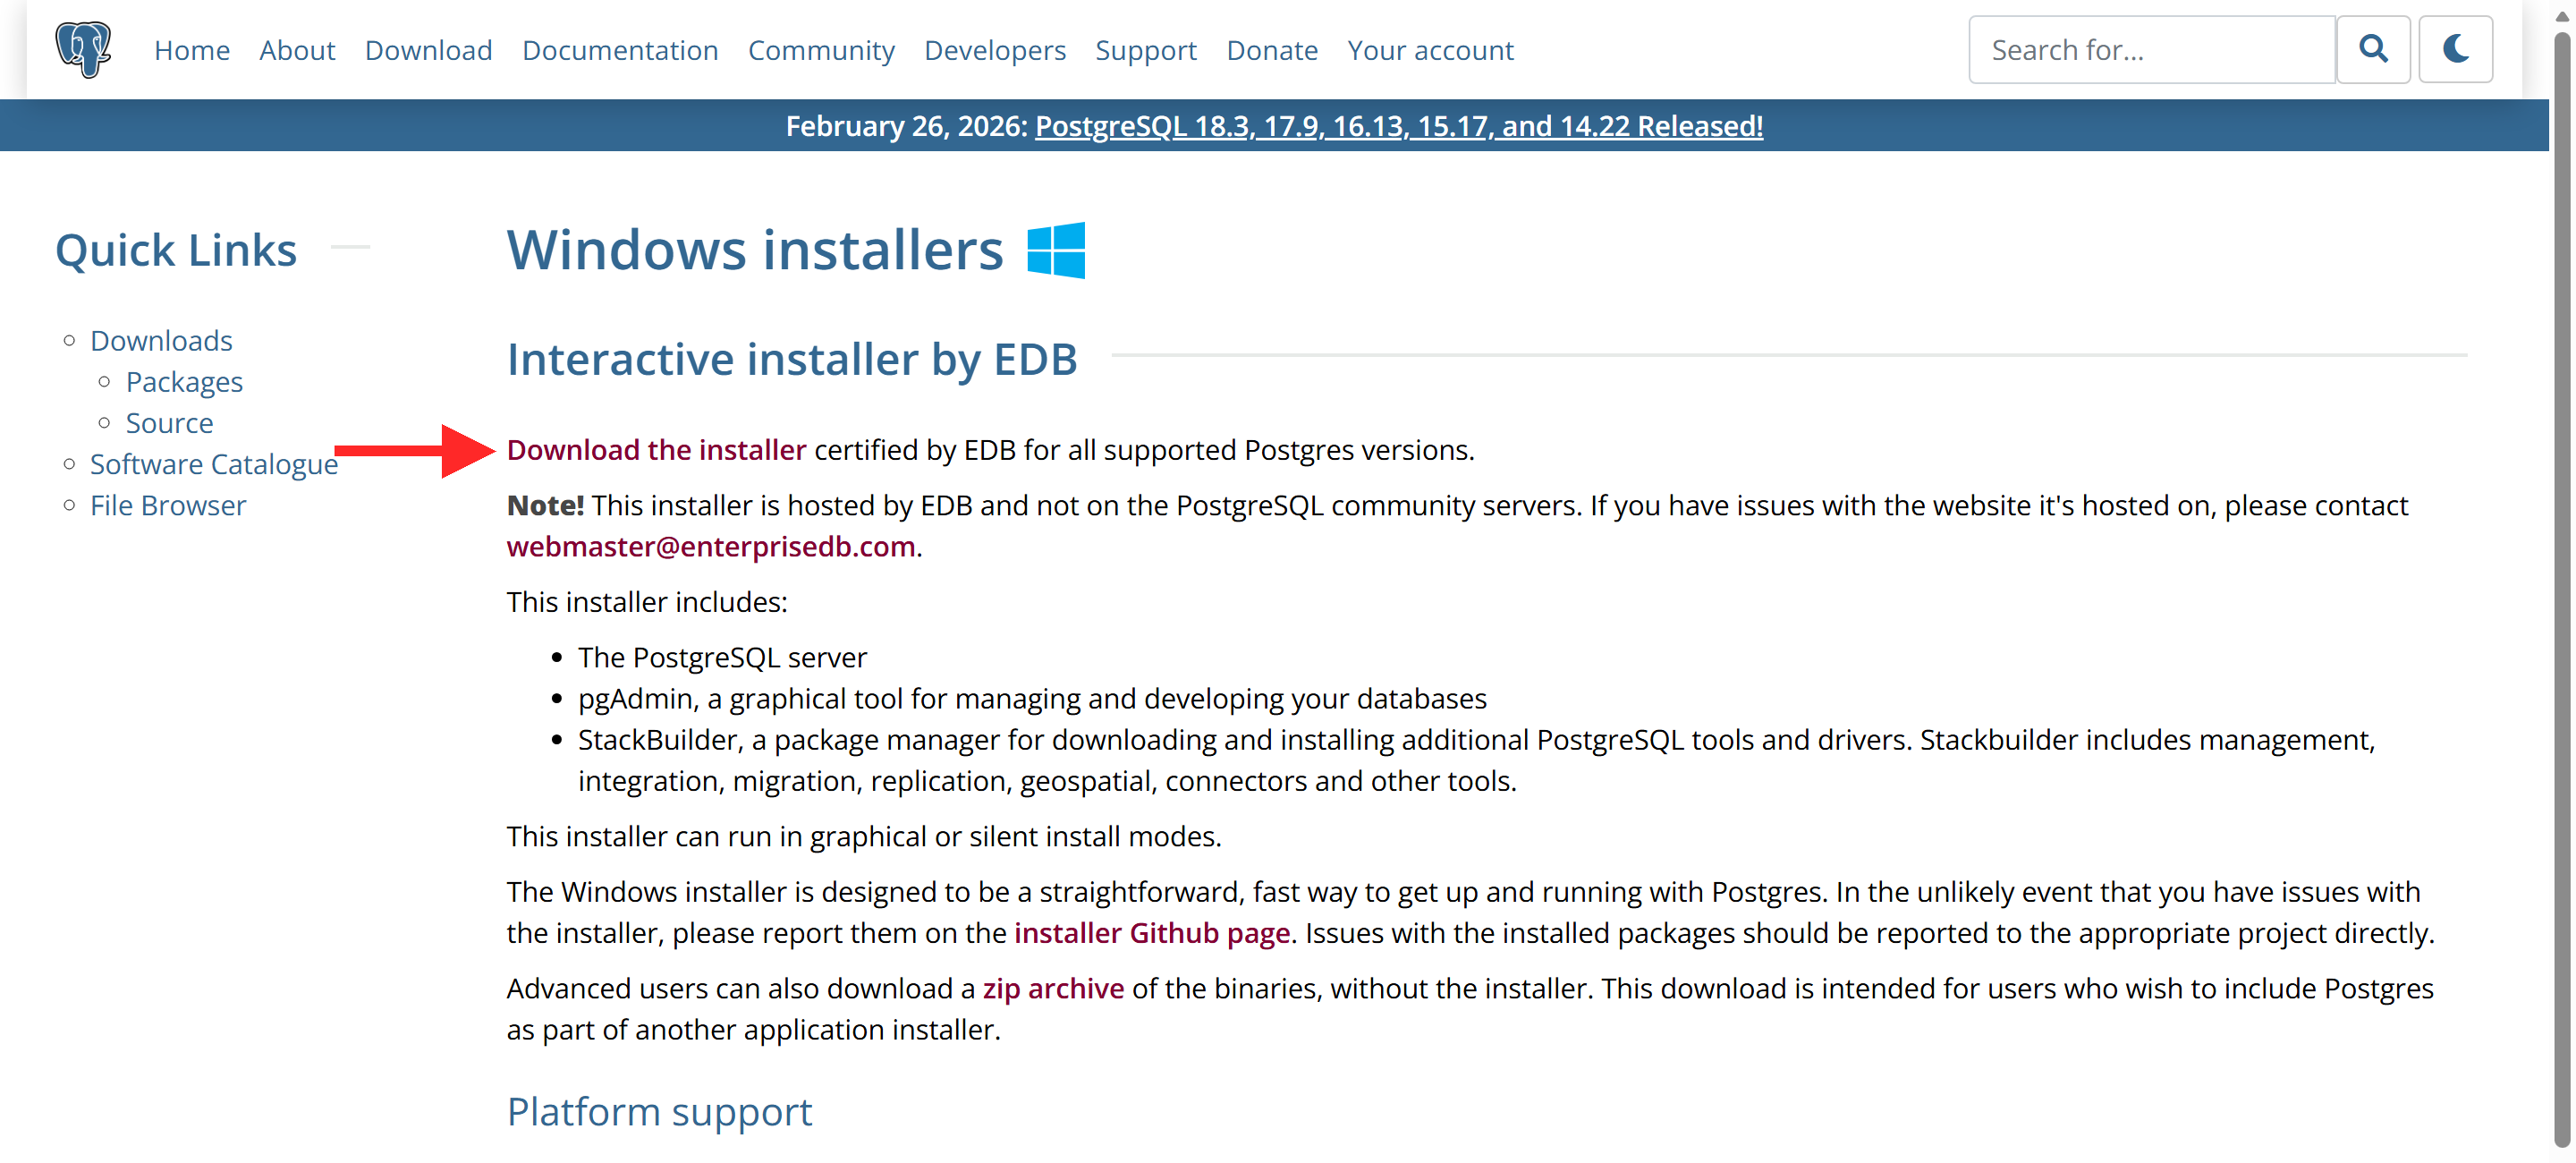
Open the PostgreSQL official download page, follow the Download the installer link, and download the latest Windows x86-64 installer.
Double-click the downloaded executable. If a UAC (User Account Control) prompt appears, click Yes.
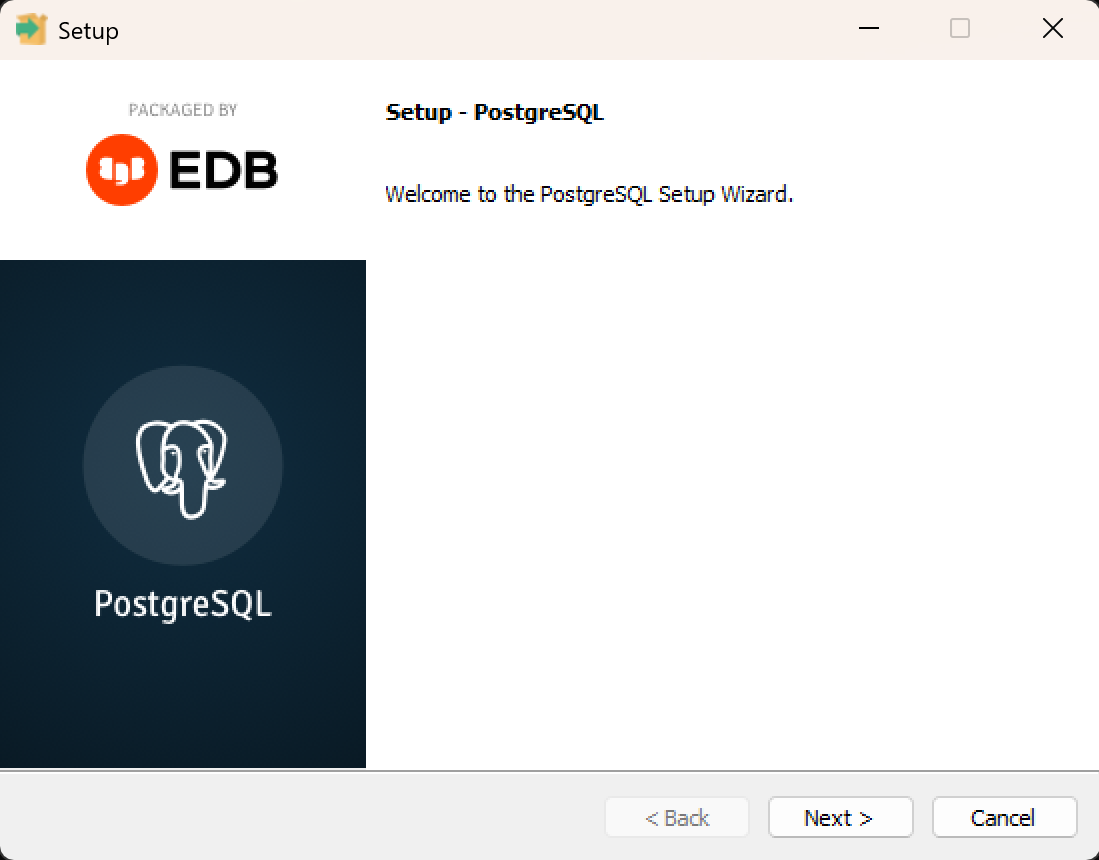
When the installer launches, the Setup - PostgreSQL Welcome screen appears. Click Next to continue.
Pick the install directory. Unless you have a reason otherwise, accept the default (C:\Program Files\PostgreSQL\17 and similar) and continue with Next.
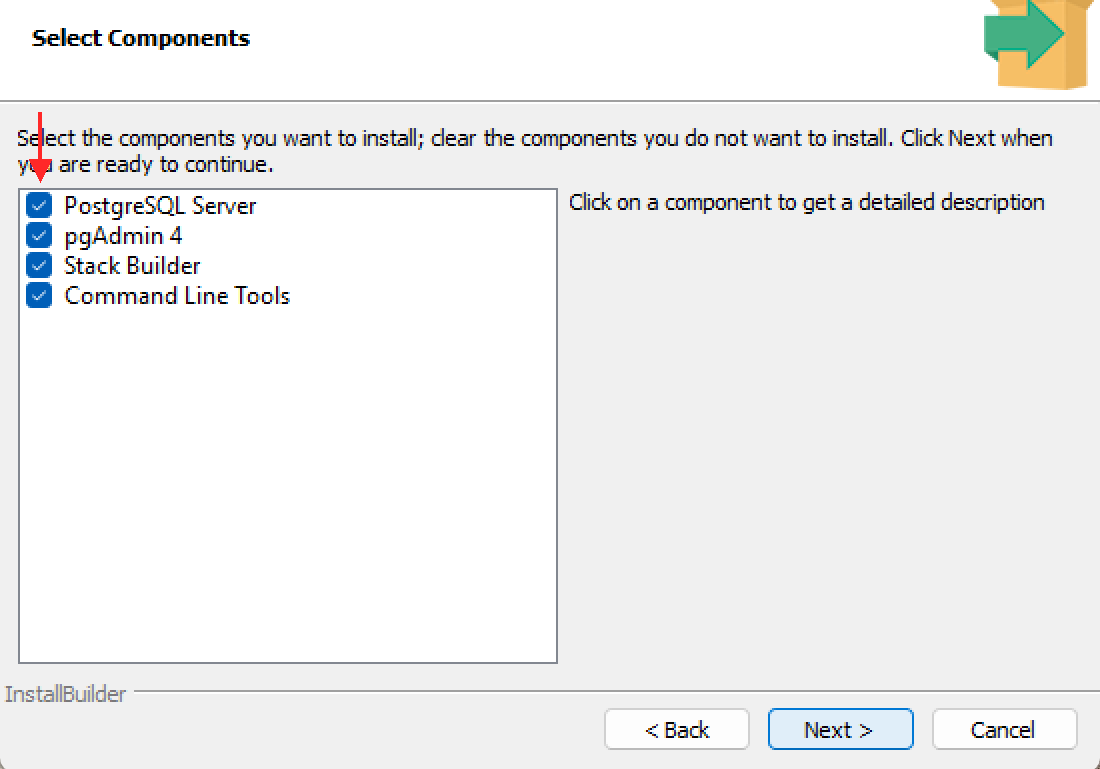
On the Select Components screen, choose the components to install. Unless you need to trim things, leave everything checked and continue with Next.
| Component | Description |
|---|---|
| PostgreSQL Server | The database itself. Required. |
| pgAdmin 4 | GUI admin tool. |
| Stack Builder | Installs optional add-ons (PostGIS, etc.) later. Usually unnecessary. |
| Command Line Tools | psql, pg_dump, and friends. Required. |
The Data Directory screen asks where to store the database files. Keep the default and continue with Next.
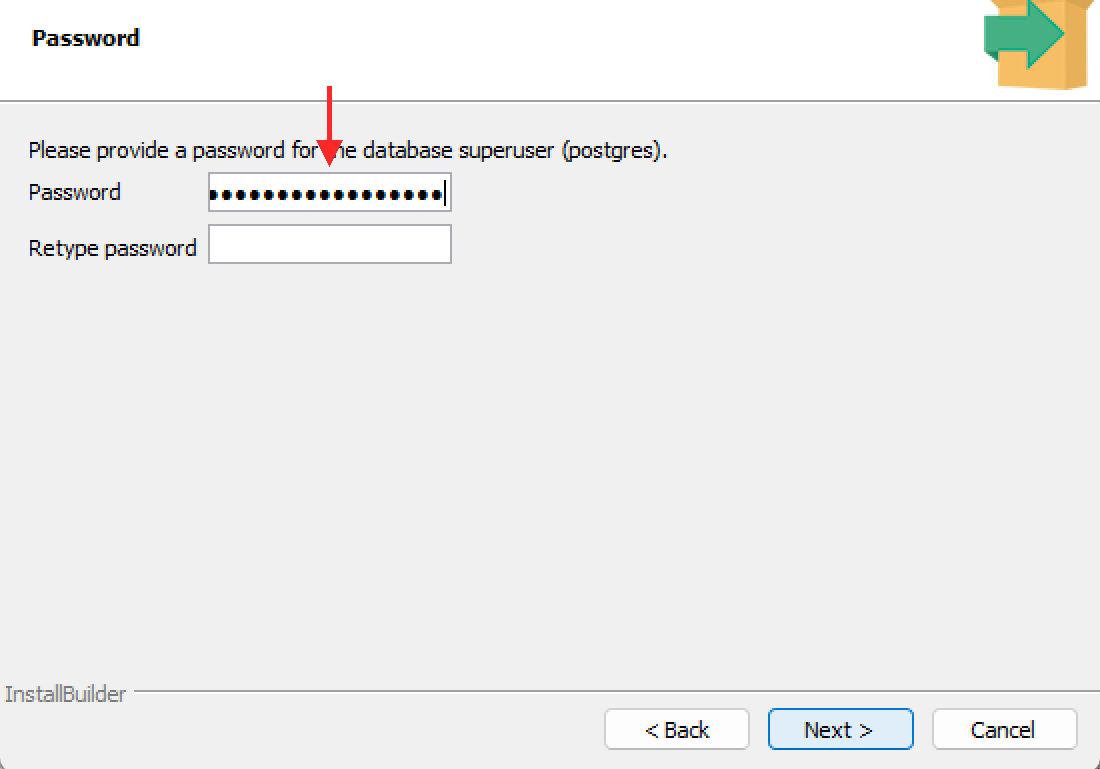
Next, on the Password screen, set the superuser (postgres) password. Enter the same string twice in Password and Retype password. It can be a short password for learning, but save it somewhere — you'll need it for future connections.
For local testing, simple ones like postgres or password work fine. For production use, set a strong password (a mix of uppercase, lowercase, digits, and symbols, 8 characters or more).
Keep the default port 5432 and Default locale. Continue.
When installation finishes, the wizard asks if you want to launch Stack Builder. Unless you need extra add-ons, uncheck that box and click Finish.
The installer registers PostgreSQL as a Windows service and starts it automatically, and adds the command-line tools to PATH. Reopen PowerShell or Command Prompt and verify:
psql --version
psql (PostgreSQL) 17.X

Version-pinned install on macOS
On macOS with Homebrew, to pin a version, append @ and the major version.
brew install postgresql@17
After installation, start the server.
brew services start postgresql
==> Successfully started `postgresql` (label: homebrew.mxcl.postgresql)
Note: If you pinned a version, you may see the following error.
brew services start postgresql
Error: Formula `postgresql@18` is not installed.
In that case, specify the version you actually installed.
brew services start postgresql@17
==> Successfully started `postgresql@17` (label: homebrew.mxcl.postgresql@17)
Connecting to PostgreSQL
Connect to PostgreSQL from a terminal. This starts an interactive session.
psql -U postgres
On Windows, after installing via the official installer, you'll be prompted for the postgres password you set during installation.
Note: If you see connection to server on socket "/tmp/.s.PGSQL.5432" failed, the server might not be running; see this section. If you see role "postgres" does not exist, see this section.
Create a database and connect to it.
CREATE DATABASE mydb;
CREATE DATABASE
\c mydb
You are now connected to database "mydb" as user "postgres".
Table creation and data operations are almost identical to MySQL.
CREATE TABLE users (
    id SERIAL PRIMARY KEY,
    name VARCHAR(50) NOT NULL,
    age INTEGER
);
CREATE TABLE
Exit with \q.
\q
Stop the server (macOS / Linux Homebrew or apt):
brew services stop postgresql
Stopping `postgresql`... (might take a while)
==> Successfully stopped `postgresql` (label: homebrew.mxcl.postgresql)
Uninstalling PostgreSQL
Before uninstalling, stop the server. First check whether it's running.
brew services list
Name          Status  User  File
postgresql@17 started _root
If the status is started, stop it.
brew services stop postgresql
Stopping `postgresql`... (might take a while)
==> Successfully stopped `postgresql` (label: homebrew.mxcl.postgresql)
Next, check the version.
psql --version
psql (PostgreSQL) 17.3
If you want to wipe the data too, check the data directory before uninstalling — you can't query it afterwards.
SHOW data_directory;
/opt/homebrew/var/postgresql@17
Uninstall (adjust the version suffix to match what you installed):
brew uninstall postgresql@17
Then remove the data directory using the path you noted earlier.
rm -rf /opt/homebrew/var/postgresql@17
On Windows, uninstall from Settings → Apps → Installed apps by selecting PostgreSQL. To remove data too, delete C:\Program Files\PostgreSQL\17\data manually.
SQL Syntax (Uppercase and Lowercase)
SQL tutorials and documentation conventionally use uppercase for keywords.
SELECT name, salary FROM employees WHERE department = 'Sales';
This stems from the 1970s, when SQL was born and computers could only handle uppercase characters. At the time, commands were entered on punch cards, and contemporary languages like COBOL and FORTRAN were also all uppercase. That tradition stuck — the official SQL standard documents still capitalize keywords, and the convention "uppercase keywords, lowercase table and column names" became common.
However, SQL itself is case-insensitive. All three of these produce the same result.
SELECT name FROM employees;
select name from employees;
Select Name From Employees;
Modern editors provide excellent syntax highlighting, so keywords are easy to spot even in lowercase. Which style you use is a team or project decision, but this site follows the SQL standard convention and uses uppercase for keywords throughout.
Try SQL Online
There are also services where you can try SQL directly in a browser, without installing anything. These are great for getting familiar with the syntax before setting up a local environment.
| Service | Description |
|---|---|
| DB Fiddle | Supports MySQL, PostgreSQL, and SQLite. Write your table definitions on the left, your queries on the right, and hit run. |
| SQLite Online | A SQLite-focused online editor. Minimal interface — try SQL right away. |
Online services are convenient, but nothing is saved between sessions. For serious learning or development, we recommend setting up a local environment.
Choosing an Editor
Here are tools useful for creating SQL files (.sql) and managing databases.
| Tool | Description |
|---|---|
| Visual Studio Code (commonly known as VSCode) | Rich SQL extensions available — syntax highlighting, completion, and database connections. Free. |
| Sublime Text | A lightweight, extremely fast editor. Its simple interface lets you focus on coding. Available on Windows, macOS, and Linux. |
| Hidemaru Editor | A legendary Japanese text editor first released in 1993. Lightweight, fast, and equipped with a powerful macro system. Windows only, one-time purchase. |
| DBeaver | A GUI tool supporting MySQL, PostgreSQL, SQLite, and many more databases. Browse and edit tables visually. Free. |
These days, Visual Studio Code seems to be the most widely used editor, but the webmaster personally loves simple and lightweight editors, so he currently uses Sublime Text. Feel free to use this as a reference.
A note about Hidemaru Editor: first released in 1993, Hidemaru is lightweight, features powerful search and replace with regular expressions, and can be customized with macros. In modern terms, macros are similar to add-ons — and Hidemaru had this capability back in the 1990s, a remarkably forward-thinking design that makes it a truly wonderful editor.
The webmaster himself used Hidemaru Editor for programming from the Windows 3.1 era through Windows 7, and owes a great deal to it over the years. Its developer, Hideo Saito, continues to update Hidemaru to this day — it runs perfectly on Windows 11 and other 64-bit versions of Windows. You can purchase Hidemaru Editor from here — it is a one-time purchase for around 4,000 yen (about $27), and having it on a Windows machine can be surprisingly handy.
(´-`).。oO(The webmaster wanted to give a personal shout-out to Mr. Saito, who he has relied on for years...)
(´-`).。oO(And yet, after 30+ years of use, the total cost has been just around $27... it's hard to find anything with better value for money...)
If the Command Is Not Found
If your terminal displays sqlite3: command not found, mysql: command not found, or psql: command not found, the PATH may not be configured correctly. Follow the steps below.
1. Find the command location
Check where the command lives.
which sqlite3
which mysql
which psql
If not found, check common install locations.
SQLite:
ls /usr/bin/sqlite3
ls /usr/local/bin/sqlite3
MySQL:
ls /usr/local/mysql/bin/mysql
ls /opt/homebrew/bin/mysql
PostgreSQL:
ls /usr/local/bin/psql
ls /opt/homebrew/bin/psql
ls /usr/local/pgsql/bin/psql
2. Check your shell
echo $SHELL
If /bin/zsh is shown, edit ~/.zshrc; if /bin/bash is shown, edit ~/.bashrc.
3. Add to PATH
Once you've located the command, add it to your shell configuration file.
macOS (zsh) — MySQL example:
echo 'export PATH="/usr/local/mysql/bin:$PATH"' >> ~/.zshrc
source ~/.zshrc
Linux (bash) — PostgreSQL example:
echo 'export PATH="/usr/local/pgsql/bin:$PATH"' >> ~/.bashrc
source ~/.bashrc
On Windows, go to Advanced System Settings → Environment Variables → Path and add the install folder for each client (e.g., C:\Program Files\MySQL\MySQL Server 8.4\bin for MySQL, C:\Program Files\PostgreSQL\17\bin for PostgreSQL, C:\sqlite for SQLite).
If You Can't Connect to the Server
If the command is found but the connection fails, the database server might not be running. SQLite is file-based and doesn't need a server, but MySQL and PostgreSQL do.
MySQL: Socket Error
If you see the following error, the MySQL server is not running.
ERROR 2002 (HY000): Can't connect to local MySQL server through socket '/tmp/mysql.sock' (2)
Check the server status.
brew services list
If MySQL shows stopped or error, start it.
brew services start mysql
After starting, try connecting again.
mysql -u root -p
If you still can't connect, the socket file path might be different. Check what socket MySQL is actually using.
mysql_config --socket
If the path shown differs from /tmp/mysql.sock, specify it with --socket when connecting.
mysql -u root -p --socket=/var/run/mysqld/mysqld.sock
MySQL: Access Denied Error
If you see the following, either the password is wrong or the user doesn't exist.
ERROR 1045 (28000): Access denied for user 'root'@'localhost' (using password: YES)
A fresh Homebrew install may leave the root password unset. Try connecting without a password.
mysql -u root
If that works, set a password for good measure.
ALTER USER 'root'@'localhost' IDENTIFIED BY 'new_password';
PostgreSQL: Connection Refused
If you see the following, the PostgreSQL server is not running.
psql: error: connection to server on socket "/tmp/.s.PGSQL.5432" failed: Connection refused
Check and start the server.
brew services list
brew services start postgresql
Then try connecting again.
psql -U postgres
PostgreSQL: Role Does Not Exist
If you see the following, the role (user) doesn't exist.
FATAL: role "postgres" does not exist
When installed via Homebrew, the default role uses your macOS username. Connect with:
psql -d postgres
To create the postgres role, run:
createuser -s postgres
If you find any errors or copyright issues, please contact us.