[Setup] Ruby Development Environment
This page walks you through setting up a Ruby development environment. macOS comes with Ruby pre-installed, so you can get started right away.
Setting Up on Windows
- Download the installer from RubyInstaller. Choosing the "WITH DEVKIT" version also supports building native extensions.
- Run the installer and follow the on-screen instructions. Make sure to check "Add Ruby executables to your PATH".
- Run the following in PowerShell or Command Prompt to verify the installation.
Double-click the downloaded installer to run it.
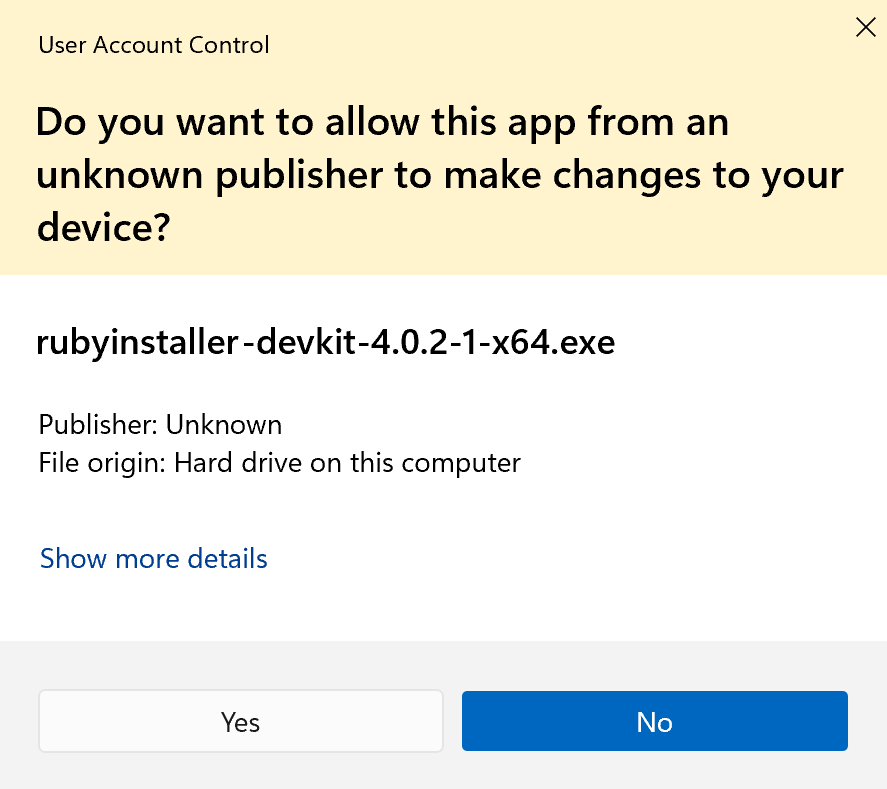
When prompted to allow administrator privileges, click "Yes".
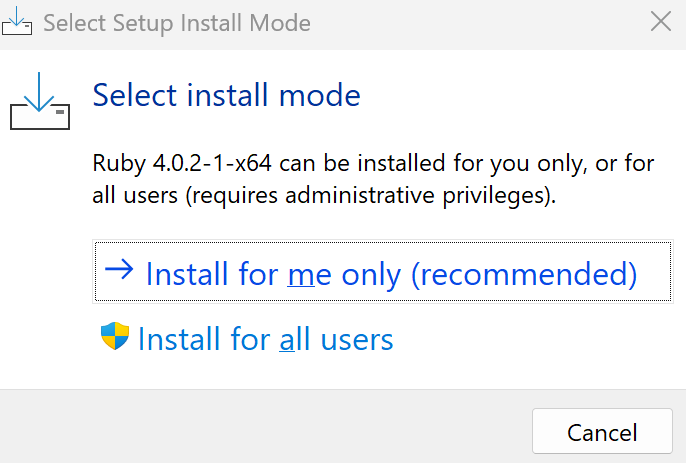
On the Select install mode screen, choose an installation mode. If you're the only user, pick the recommended Install for me only (recommended). If the PC is shared and you want Ruby available for everyone, pick Install for all users. When in doubt, the recommended Install for me only is fine.
Accept the license and click "Next".

Make sure "Add Ruby executables to your PATH" is checked, then click "Install".

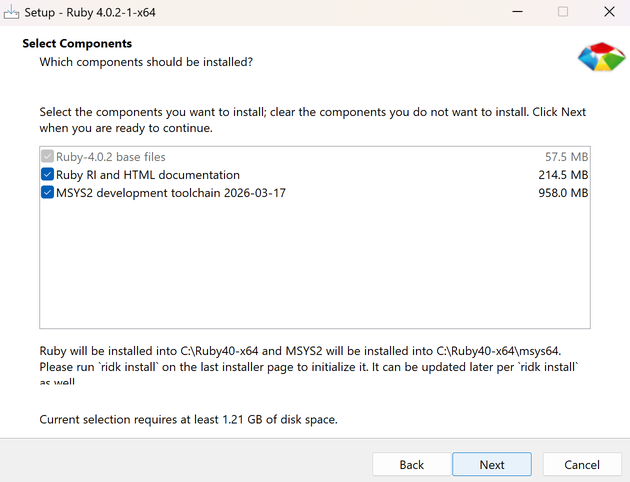
Select the components to install. Normally, just click "Next".
When the following screen appears, the installation is complete.

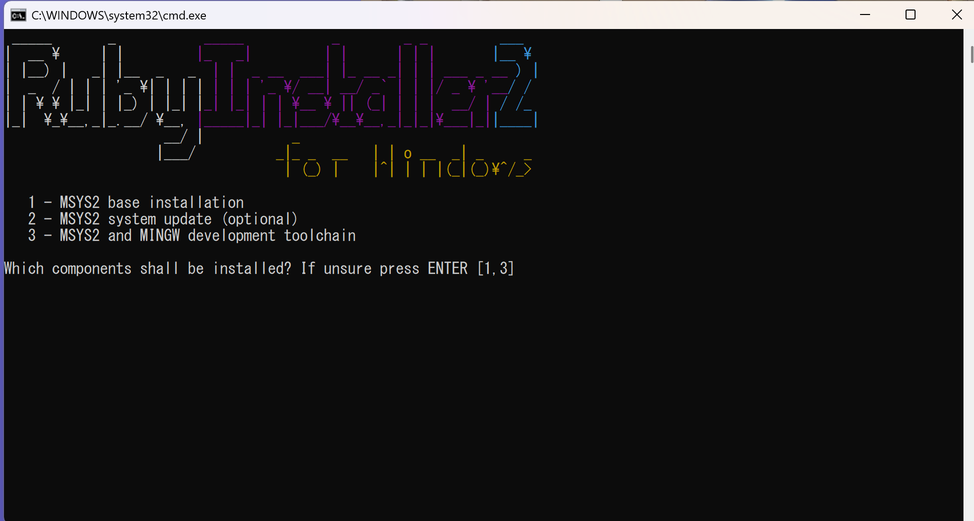
After the installation finishes, the MSYS2 setup screen will appear. Press Enter to complete the setup.
Verifying the installation on Windows
Open PowerShell or Command Prompt and run the following.
ruby --version
ruby 3.3.11 (2026-03-26 revision 1f2d15125a) [x64-mingw-ucrt]
If a version number is displayed, the installation was successful.
Setting Up on macOS
macOS comes with Ruby pre-installed. You can verify it by running the following in Terminal.
ruby --version
If you want the latest version, you can install it using Homebrew or rbenv.
Homebrew is a package manager for macOS. If it is not installed, follow the instructions on the official site (https://brew.sh/) to install it first.
To install with Homebrew:
brew install ruby
To manage versions with rbenv:
brew install rbenv
rbenv install 3.3.11
rbenv global 3.3.11
Using rbenv lets you switch Ruby versions per project.
Running a Program
1. Create the source file
Use a text editor to create a file named hello.rb with the following content.
hello.rb
puts "Hello, World!"
puts "Lab members: Okabe Rintaro, Makise Kurisu, Shiina Mayuri"
2. Run
ruby hello.rb
Hello, World!
Lab members: Okabe Rintaro, Makise Kurisu, Shiina Mayuri
If the output matches the above, you're all set.
Interactive Mode (irb)
irb (Interactive Ruby) lets you try Ruby code one line at a time. It is handy for quick checks.
irb
Once started, a prompt appears. Enter code and the result is returned immediately.
<span class="lit">1</span> + <span class="lit">2</span>
<span class="lit">3</span>
<span class="str">"Hello"</span>.length
<span class="lit">5</span>
exit
Type exit or press Ctrl + D to quit irb.
Choosing an Editor
| Tool | Description |
|---|---|
| Visual Studio Code (commonly known as VSCode) | Currently the most popular editor. Installing the Ruby extension adds code completion and syntax checking. |
| Sublime Text | A lightweight, extremely fast editor with built-in Ruby syntax highlighting. |
| Vim | A lightweight editor that runs in the terminal with built-in Ruby syntax highlighting. It takes some getting used to, but is also useful for working on servers. |
| Hidemaru Editor | A legendary Japanese text editor first released in 1993. Lightweight, fast, and equipped with a powerful macro system. Windows only, one-time purchase. |
| RubyMine | A Ruby-dedicated IDE (Integrated Development Environment — a tool combining code editing, execution, and debugging in one place) by JetBrains. Offers advanced code analysis, debugging, and test support. Paid. |
These days, Visual Studio Code seems to be the most widely used editor, but the webmaster personally loves simple and lightweight editors, so he currently uses Sublime Text. Feel free to use this as a reference.
A note about Hidemaru Editor: first released in 1993, Hidemaru is lightweight, features powerful search and replace with regular expressions, and can be customized with macros. In modern terms, macros are similar to add-ons — and Hidemaru had this capability back in the 1990s, a remarkably forward-thinking design that makes it a truly wonderful editor.
The webmaster himself used Hidemaru Editor for programming from the Windows 3.1 era through Windows 7, and owes a great deal to it over the years. Its developer, Hideo Saito, continues to update Hidemaru to this day — it runs perfectly on Windows 11 and other 64-bit versions of Windows. You can purchase Hidemaru Editor from here — it is a one-time purchase for around 4,000 yen (about $27), and having it on a Windows machine can be surprisingly handy.
(´-`).。oO(The webmaster wanted to give a special shout-out to Mr. Saito, whom he has relied on for many years...)
(´-`).。oO(Over 30 years of use and the total cost was just around 4,000 yen... it is hard to find anything else with such incredible value...)
(´-`).。oO(Well then, please continue with the setup. Good luck with the environment configuration...)
If the Command Is Not Found
If your terminal displays ruby: command not found, the PATH may not be configured correctly. Follow the steps below to check and fix the issue.
1. Find the command location
Check where the command is located.
which ruby
which irb
If not found, check common installation locations.
ls /usr/local/bin/ruby
ls /opt/homebrew/bin/ruby
2. Check which shell you are using
echo $SHELL
If /bin/zsh is shown, edit ~/.zshrc; if /bin/bash is shown, edit ~/.bashrc.
3. Add to PATH
Once you know the command location, add the PATH to your shell configuration file.
For macOS (zsh):
echo 'export PATH="/opt/homebrew/bin:$PATH"' >> ~/.zshrc
source ~/.zshrc
For Linux (bash):
echo 'export PATH="/usr/local/bin:$PATH"' >> ~/.bashrc
source ~/.bashrc
If you are using rbenv
If Ruby installed via rbenv is not found, the shell initialization may be missing. Add the following to your shell configuration file.
For macOS (zsh):
echo 'eval "$(rbenv init -)"' >> ~/.zshrc
source ~/.zshrc
For Linux (bash):
echo 'eval "$(rbenv init -)"' >> ~/.bashrc
source ~/.bashrc
For Windows, go to "Advanced System Settings" → "Environment Variables" → "Path" to add the entry. If you used RubyInstaller and checked "Add Ruby executables to your PATH" during installation, this is set automatically.
Uninstalling Ruby
To uninstall the Ruby version installed via Homebrew, run the following command.
brew uninstall ruby
To remove a specific version installed via rbenv, run the following command.
rbenv uninstall 3.3.11
To uninstall rbenv itself, run the following command.
brew uninstall rbenv
Don\'t forget to also remove the eval "$(rbenv init -)" line from your shell configuration file (~/.zshrc or ~/.bashrc).
On Windows, go to Settings → Apps → Installed apps, find "Ruby", and click Uninstall.
If you find any errors or copyright issues, please contact us.